Revision: dfcfbc502e
Edited Advance
@@ -1 +1,80 @@
-No Content
+### Advance Configuration :
+
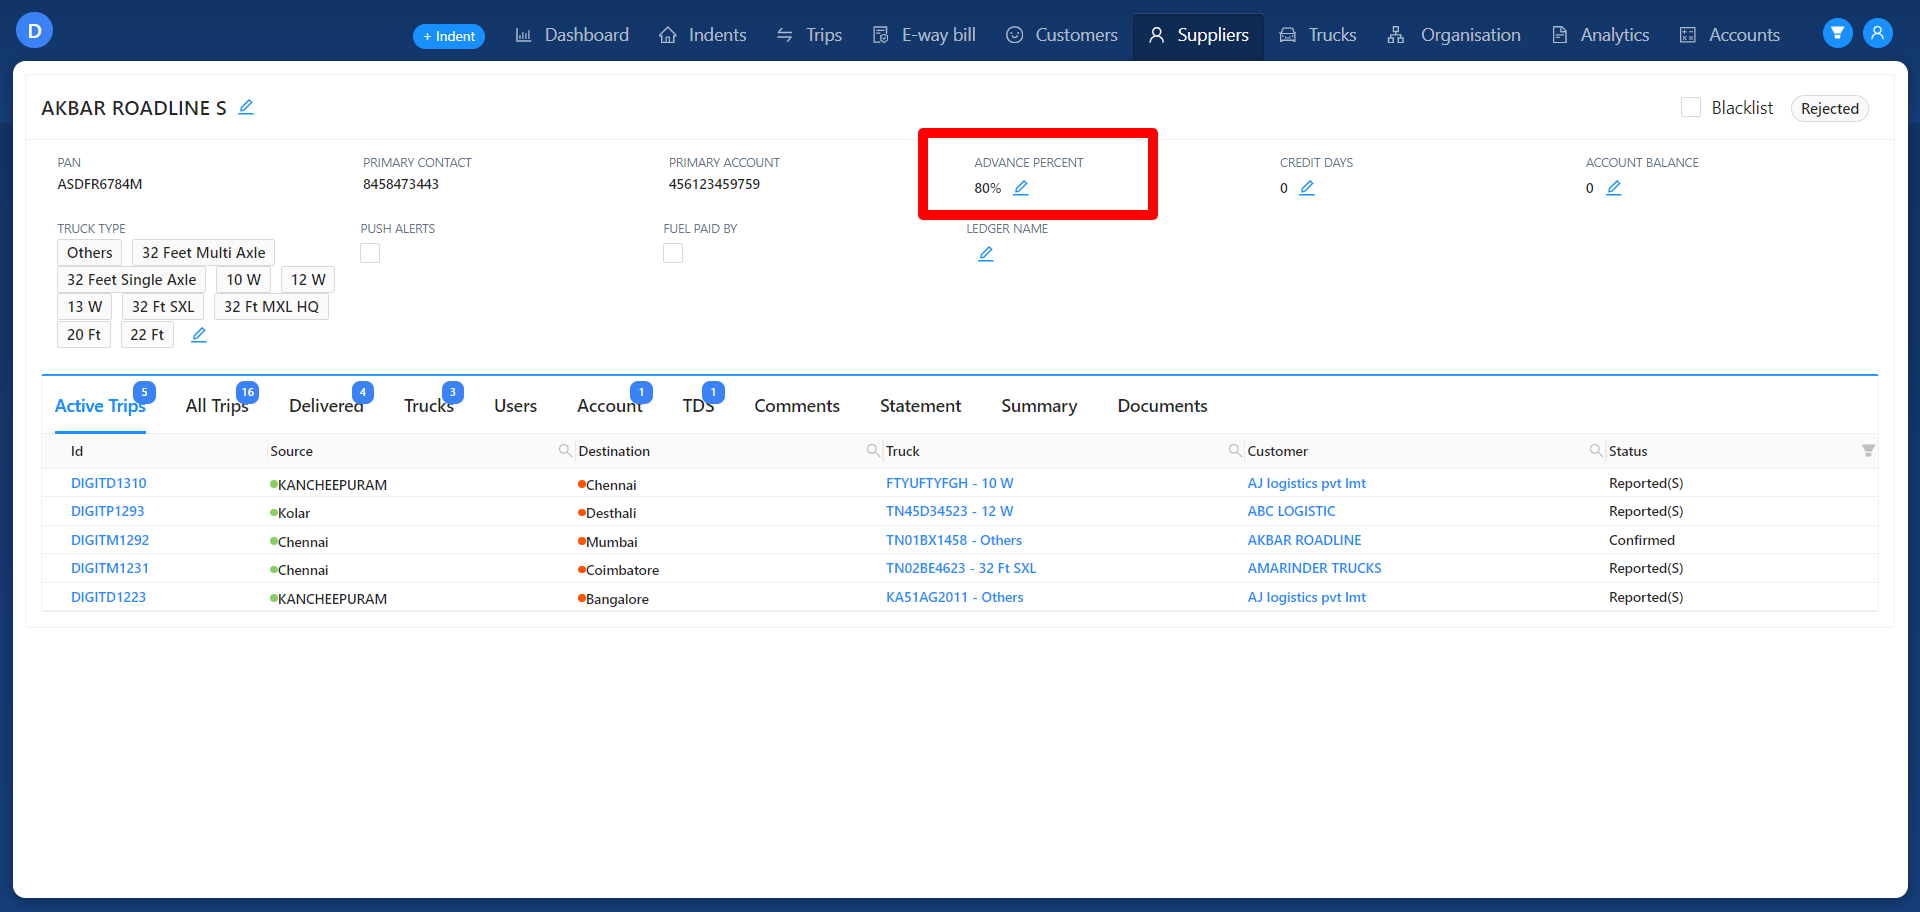
+1. The creation of supplier advances is based on the advance percentage configuration specified in the supplier detail page.
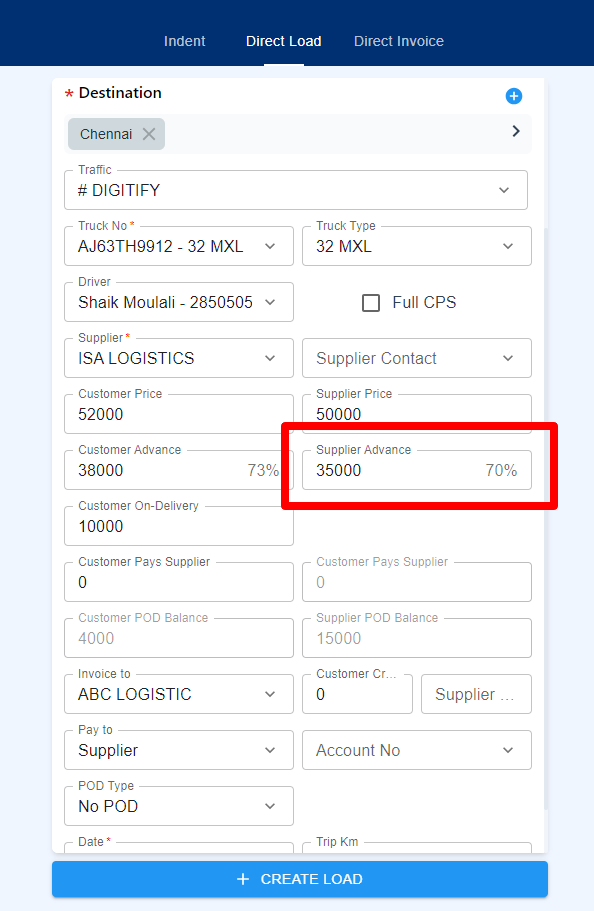
+2. Users also have the capability to edit the supplier advance during the trip creation process. This feature provides flexibility in managing and updating supplier advances based on specific trip requirements and configurations.
+
+### 
+
+### Advance Creation :
+
+1. Supplier Advance can be created in both via indent to trip and Direct load.
+
+
+
+### Advance Eligible :
+
+1. Users can process supplier advances once the Lorry Receipt (LR) has been updated for the trip.
+
+For reference to upload LR refer following URL : [https://wiki.digitify.app/docs/operations/trips/lr/e-lr](https://wiki.digitify.app/docs/operations/trips/lr/e-lr)
+
+### Advance Verification :
+
+1. Navigate to the Advance tab and select the trips that require approval.
+2. Once the trips are selected, the "Approve" button will become active, located at the top right of the Advance tab.
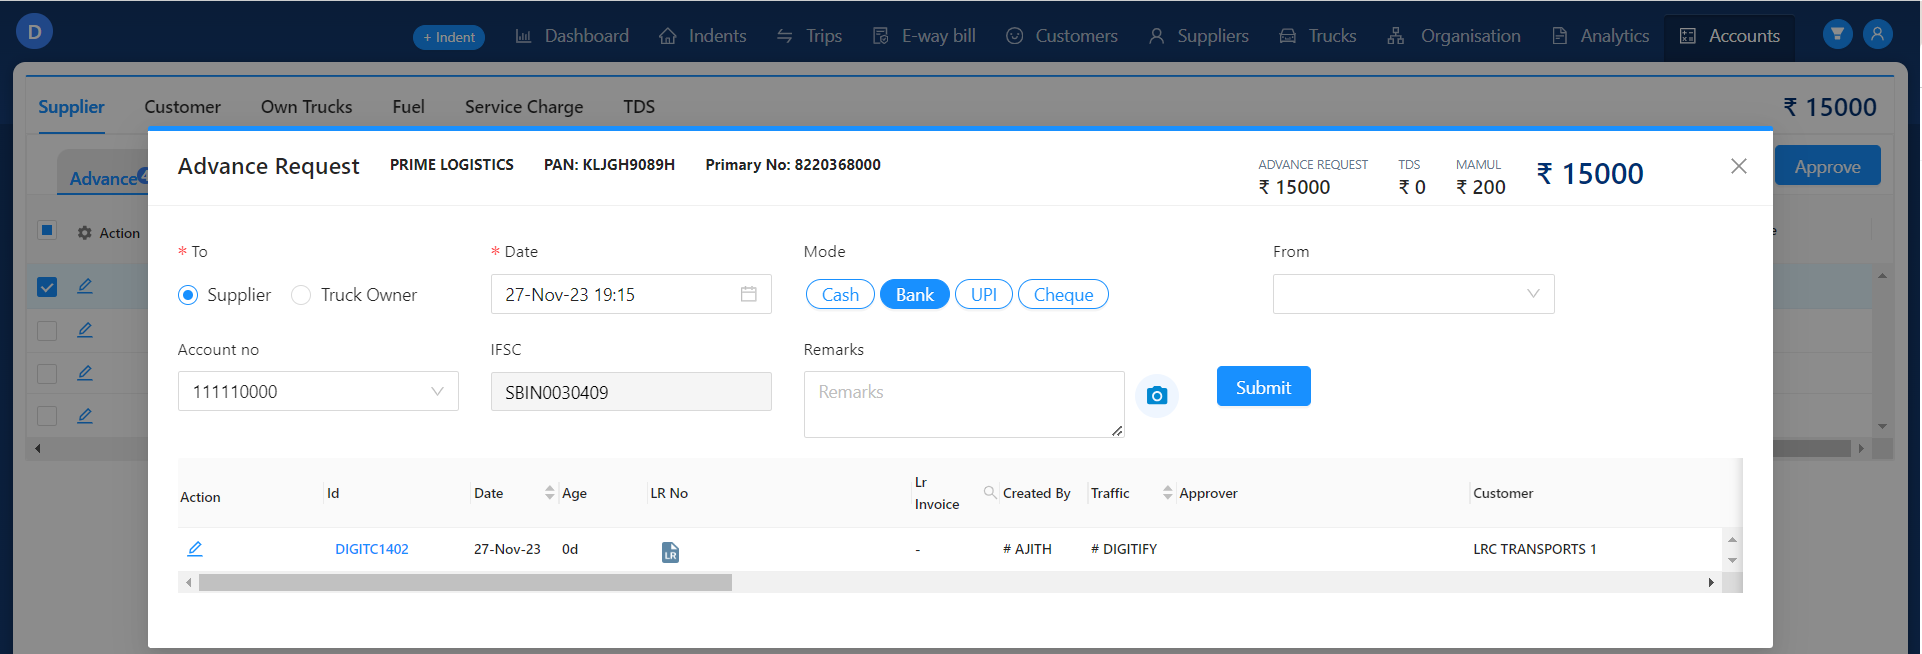
+3. Clicking the "Approve" button displays the Advance Request module.
+
+
+
+1. Inside this module, the user can carry out the approval process for the selected trips.
+2. Users with roles such as Admin, BM (Branch Manager), SRM (Senior Relationship Manager), and CRM (Customer Relationship Manager) are authorized to approve supplier advances.
+3. Their responsibility includes verifying the accuracy of the created advance and ensuring that all entered data, such as account numbers (From and To), IFSC code, and payment mode to the supplier, are correct.
+4. Once all data is confirmed, the user can approve the payment by clicking the "Submit" button.
+
+
+
+### Processing Approved Advance:
+
+1. After the payment is approved, the related trips are transferred to the Payment tab.
+2. Users with authentication roles can process the approved advance by selecting the "Approve" button.
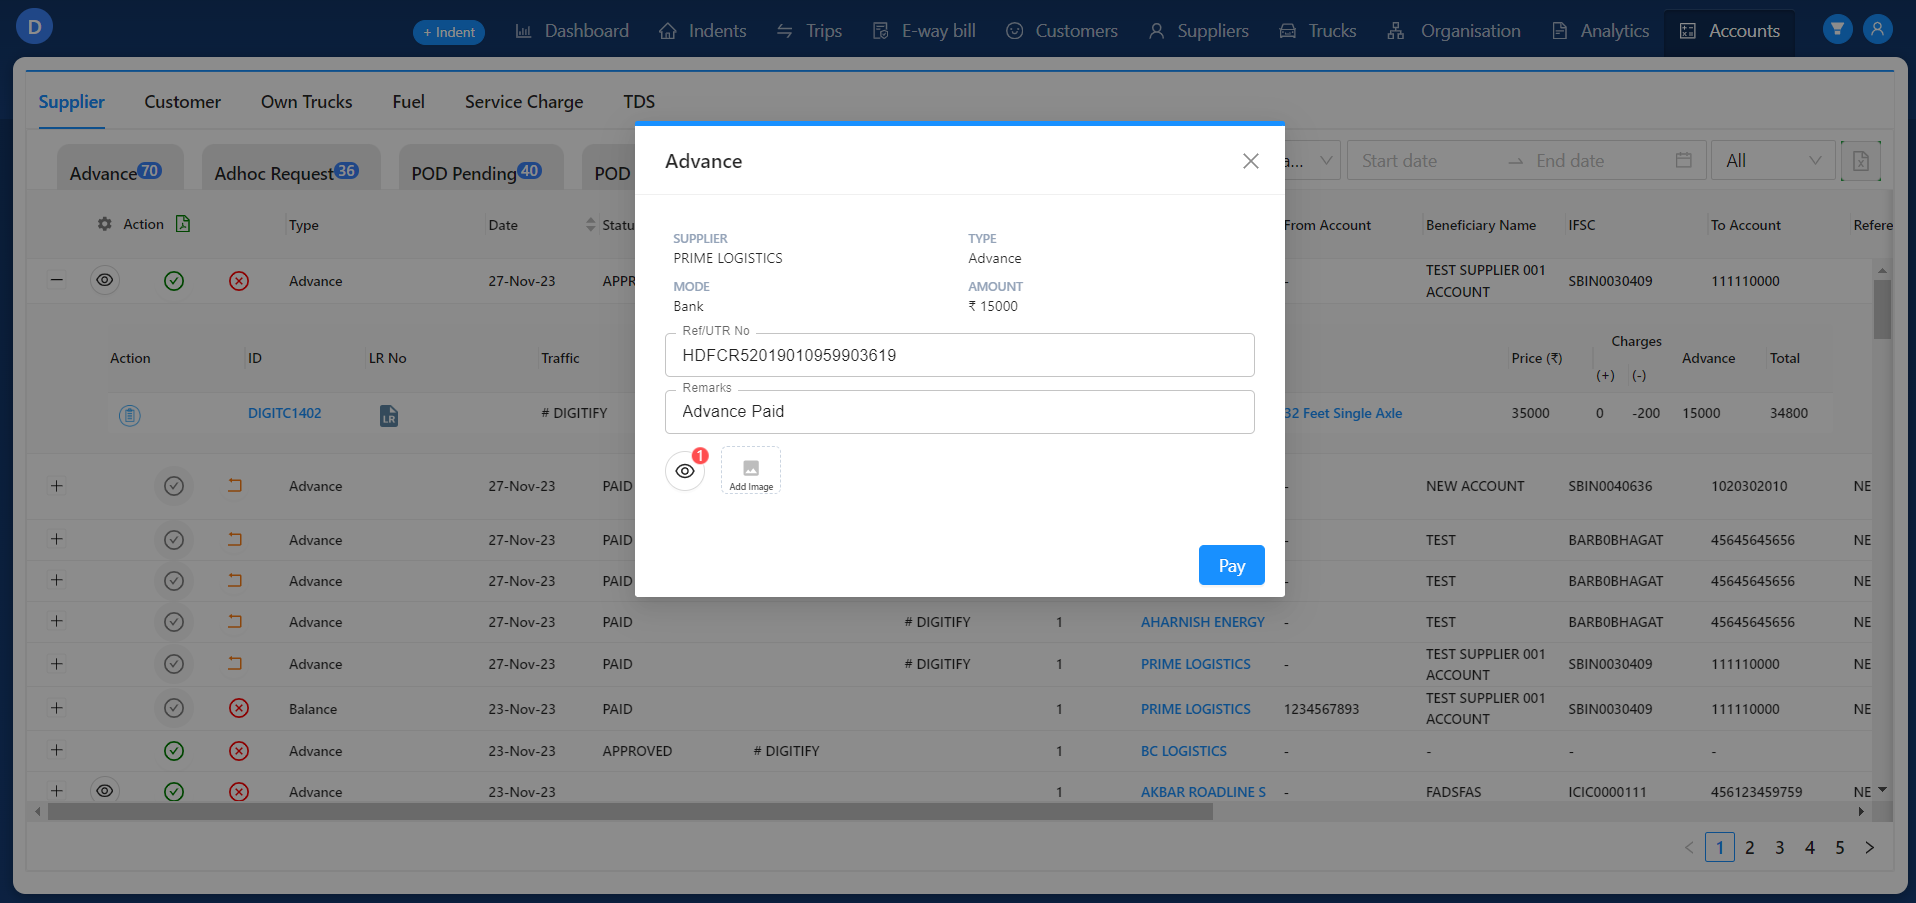
+3. Clicking the "Approve" button opens the Advance Approval module, displaying detailed information like supplier name, type of payment (Advance or Balance), mode, and amount.
+4. In this module, users can input the Universal Transaction Number (UTR) or reference number, remarks, and upload proof of payment file.
+
+
+
+### Additional Advance :
+
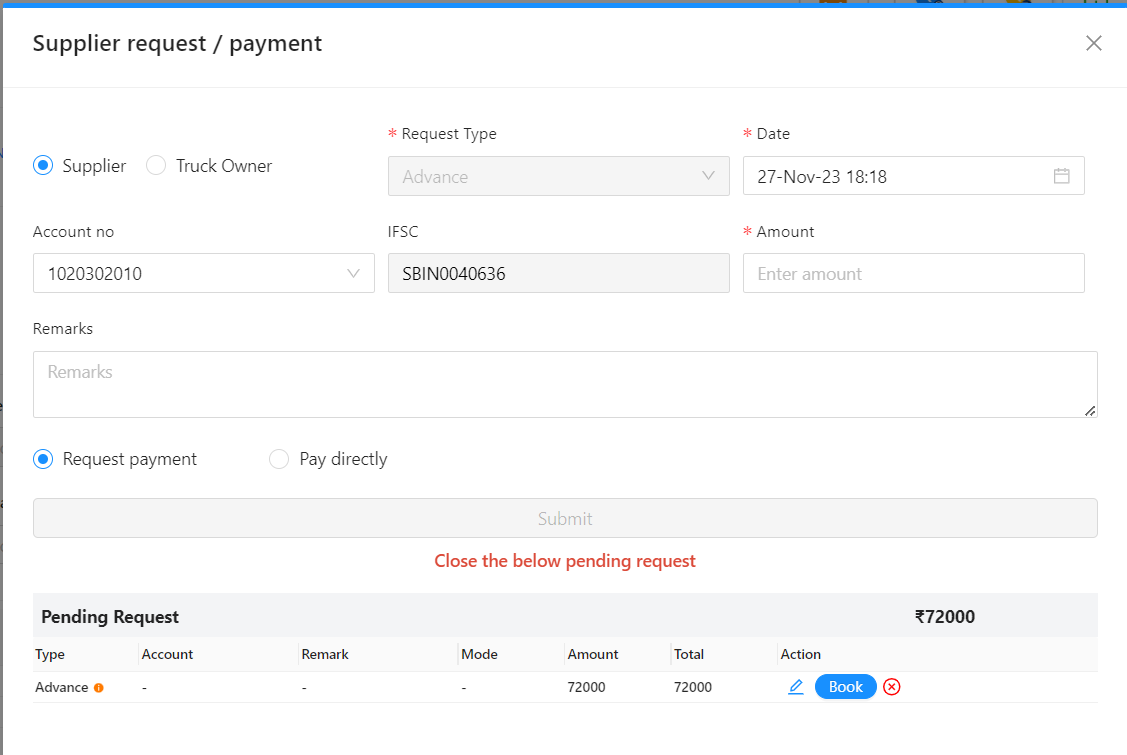
+1. Once a previously processed advance for a supplier has been completed, users gain access to create an additional advance for the supplier from the trip detail page.
+
+**Note :** If request already presented Shows error message and not allow user to create additional advance.
+
+
+
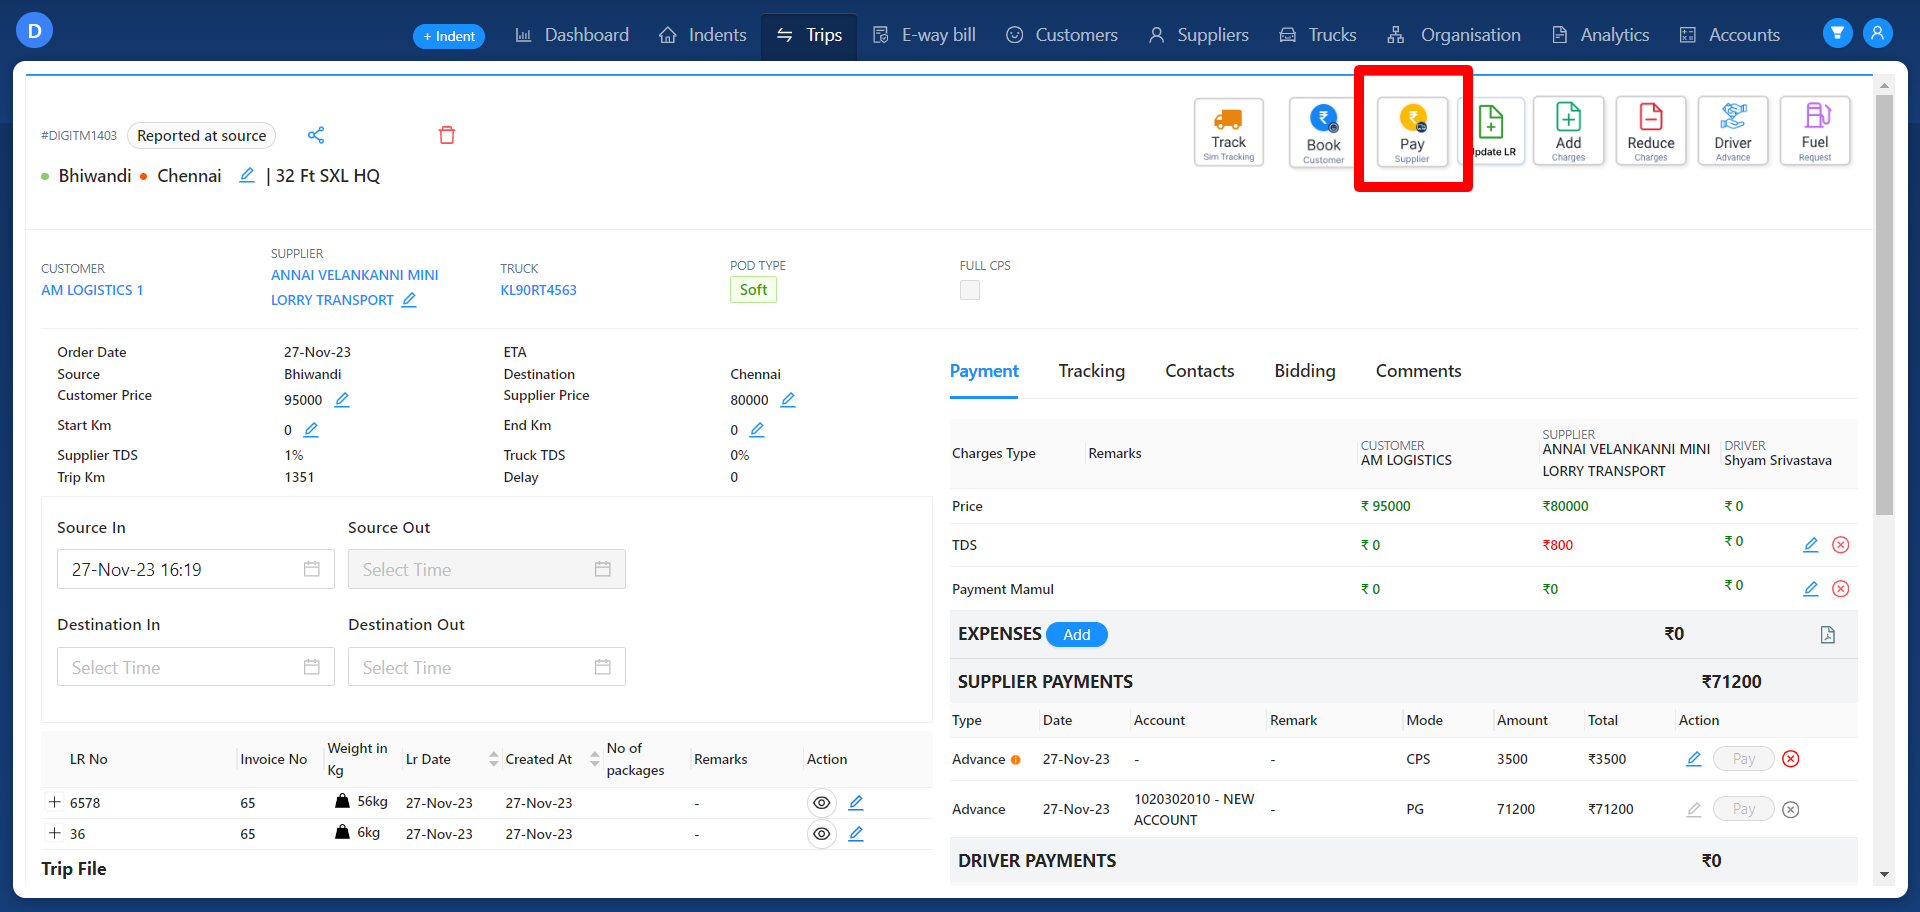
+2.This functionality is accessible by clicking the "Pay Supplier" button situated at the top right corner of the trip detail page.
+
+
+
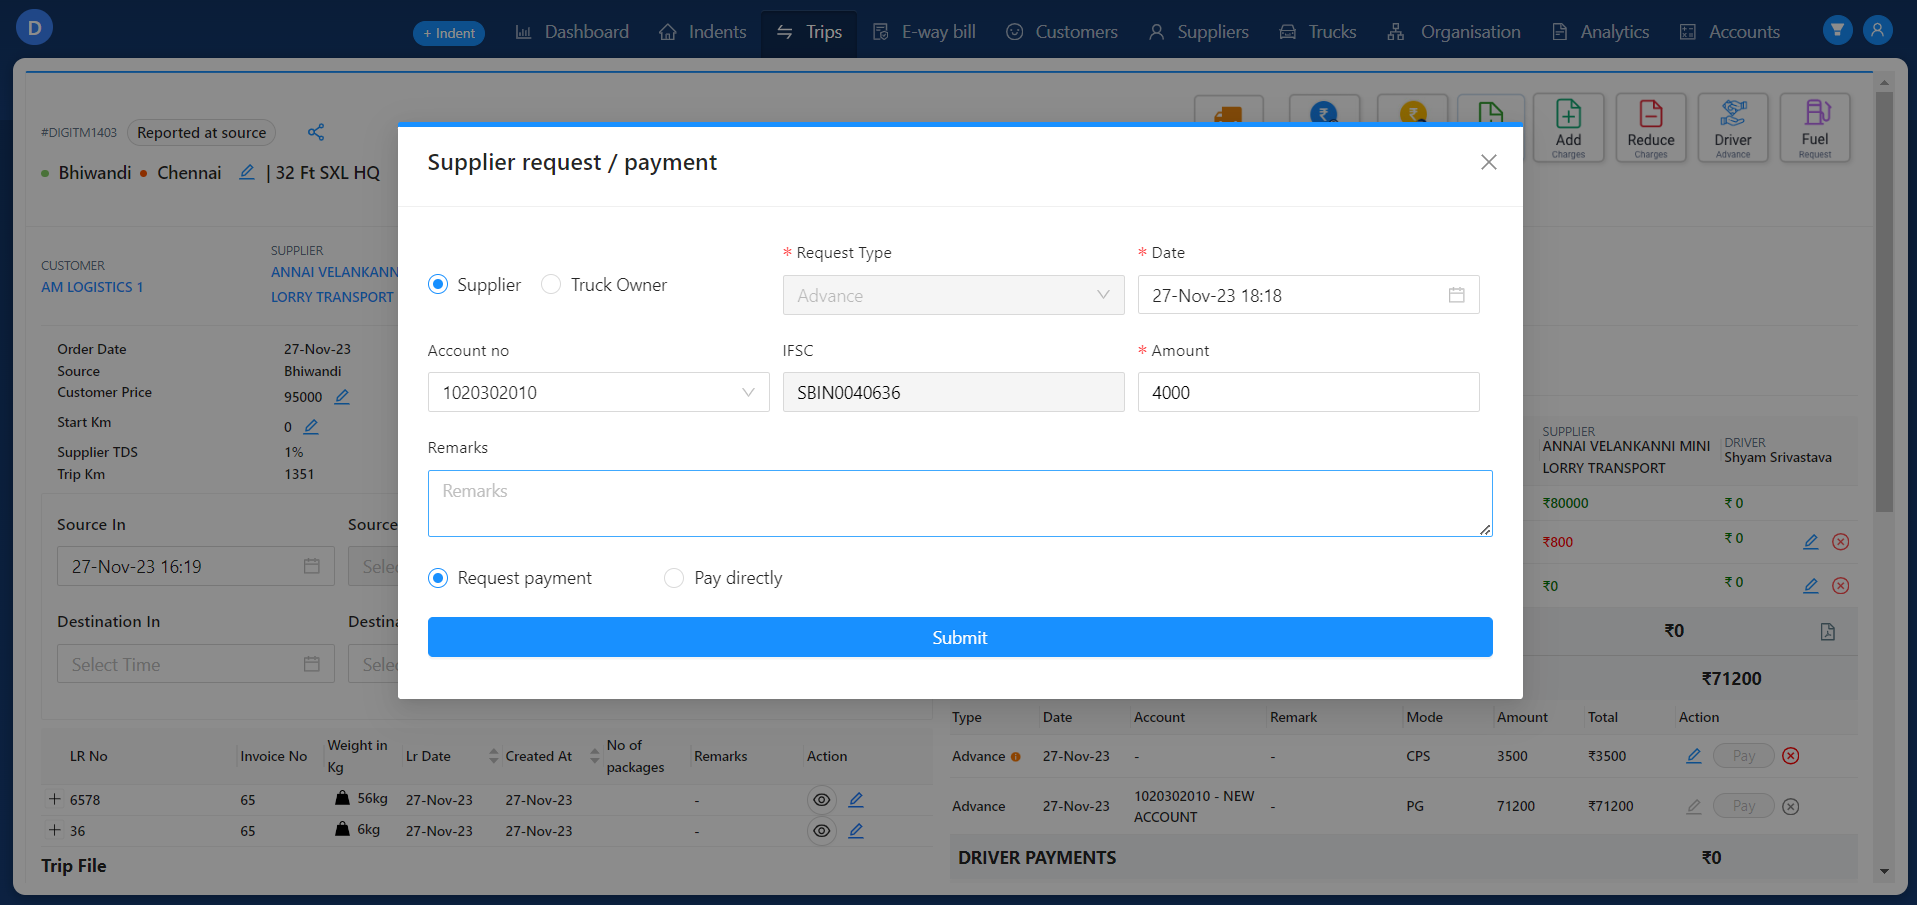
+3.Upon clicking this button, the Supplier Request/Payment module will open, allowing users to create an additional advance for the supplier.
+
+
+
+4.Within this module, users have the option to generate an additional advance as request or make as direct payment to the supplier by selecting the respective radio buttons (Pay directly or Request Payment).
+
+5.To proceed, users must update the necessary details such as IFSC code, account number, date, request type (Advance or balance), and remarks.
+
+6.After an additional advance is created, the entry will appear in the Adhoc Request tab within the Supplier > Payments section.
+
+### Processing Additional Advance
+
+1. To process additional advance user should navigate to Adhoc request tab in Accounts > Supplier > Adhoc Request tab.
+2. Here it displays all list of trips that additional advance had been created with their detailed information .
+3. Use the checkboxes provided near to each trip id to select the ones you want to process for additional advance.
+4. Once you've selected the trips, the 'Pay' button at the top-right corner of the page will be activated.
+5. Click on the 'Pay' button to initiate the process for additional advance.
+6. This process will be similar to the one used for supplier advance.
+7. Enter necessary details related to the additional advance for the selected trips.
+8. Ensure all required information is correctly entered.
+9. Once completed, submit the request for additional advance for the selected trips.
+
+To know more about to process Additional Advance refer below :
+
+<iframe src="https://scribehow.com/embed/Make_Payment_and_Submit_Remarks_for_Adhoc_Request__fdQQg_YWR6WA3VZpRwLPBQ" width="100%" height="640" allowfullscreen frameborder="0"></iframe>