Revision: 95ca70d181
Edited Create Indent
@@ -1 +1,65 @@
-No Content
+Following roles only had an access to create indent in desk
+
+1. Admin
+2. BM
+3. Traffic
+4. Indent Admin
+
+To create an indent, the user can select the "Indent" button near the Dashboard tab. This will open a page where the user can enter all the required data, such as the source name, destination name, traffic employee, truck type, and more.
+
+The create indent page consists of three tabs: Indent, Direct Load, and Direct Invoice. The first tab, named "Indent," is where the user can create the indent. It's important to note that the user will only be allowed to create the indent once all mandatory data has been updated. The specific mandatory data may vary based on the user needs.
+
+By ensuring that all mandatory data is provided, the system ensures that the necessary information is complete before proceeding with the creation of the indent.
+
+
+| Field Names | **Functions** |
+|---------------------------------------|------------------------------------------------------------------------------------------------------------------------------------------------------------------------------------------------------------------------------------------------------------------------------------------------------------------------------------------------------------------------------------------------------------------------------------------------------------------------------------------|
+| **Lane Code** | In this field if user pick a lane code, it fills all necessary details for creating an indent, like customer name, start and end points and more, saving user time and effort. |
+| **Indent Id** | This field allows user to update the indent ID for future reference. |
+| **Customer Name** | This field displays all Customer names in company. While click on the Customer field It displays all customer names on right, and also user can able to select customers by searching their names in search field on top of the customer names. |
+| **Source Name** | Here user can enter starting point of the trip. |
+| **Destination Name** | Here user can update endpoint or delivery location of the trip. |
+| **Traffic** | While click on this field, displays traffic role employee list where user can allow to allocate traffic employee for upcoming trips related to this indent. After customer selected traffic employee will auto filled based on customer branch. |
+| **Branch** | In this field, users have the option to select their company branch, ensuring that employees from other branches cannot access data from different branches. By default, the field displays the source branch name configured in the organization tab by the admin. This restriction helps maintain data confidentiality and ensures that information is only accessible to the relevant branch employees. |
+| **Truck Type** | Here users can select the truck type for creating the indent. The available truck types are displayed on the right side for user selection. If the indent is created from a lane, this field will be automatically filled with the truck type entered when the lane was created. |
+| **Ton** | Here user can able to enter weightage of the load in Tons. |
+| **Customer Price and Supplier Price** | In this system, the user can enter the prices for both the customer and the supplier by manually inputting the respective amounts. It's important to note that the supplier price is not validated against the customer price. This means that the user has the ability to update the supplier amount to be higher than the customer price. This type of payment, where the supplier price exceeds the customer price, is useful for adjusting any pending balances from previous trips. |
+| **Date** | Date of the indent created. |
+| **No of Vehicle** | Here users can enter the number of trucks required for the indent, which helps in avoiding multiple indents for the same source and destination. Users can input any count based on the customer's request or requirements. |
+| **Material Type** | In this field, users have the option to add a material type for creating the indent by clicking on the material type field. Upon clicking, a list of material types will be displayed on the right side, which are configured by the admin in the organization tab > Master > Material Type. Users can select any desired material type from the displayed list. |
+| **Expiry Time** | The specified time limit or expiration period for indent. If time extends after expiry time indent deletes automatically. |
+| **Remark** | Here user can update any additional notes or comments. |
+| **Post to supplier** | This field includes a checkbox that is checked by default. By selecting this checkbox, the user grants permission for the supplier to view the created indents. This allows the supplier to express their interest in a particular indent. Once the supplier shows interest in an indent, the admin, BM (Branch Manager), or traffic role employees can review and confirm the trip with the interested supplier. |
+| **Destination BM can Track** | If this checkbox is checked Bm role employees can able to view trips that contains their branch mapped cities as destination. |
+
+
+### **Creating Multi Loading and Multi Unloading points**
+
+User can able to create multi loading and multi unloading points in two way
+
+1. Configure in Customer Lane (Multi Unloading Points)
+2. In Adhoc Indents
+
+### **Configure in Customer Lane (Multi Unloading Points)**
+
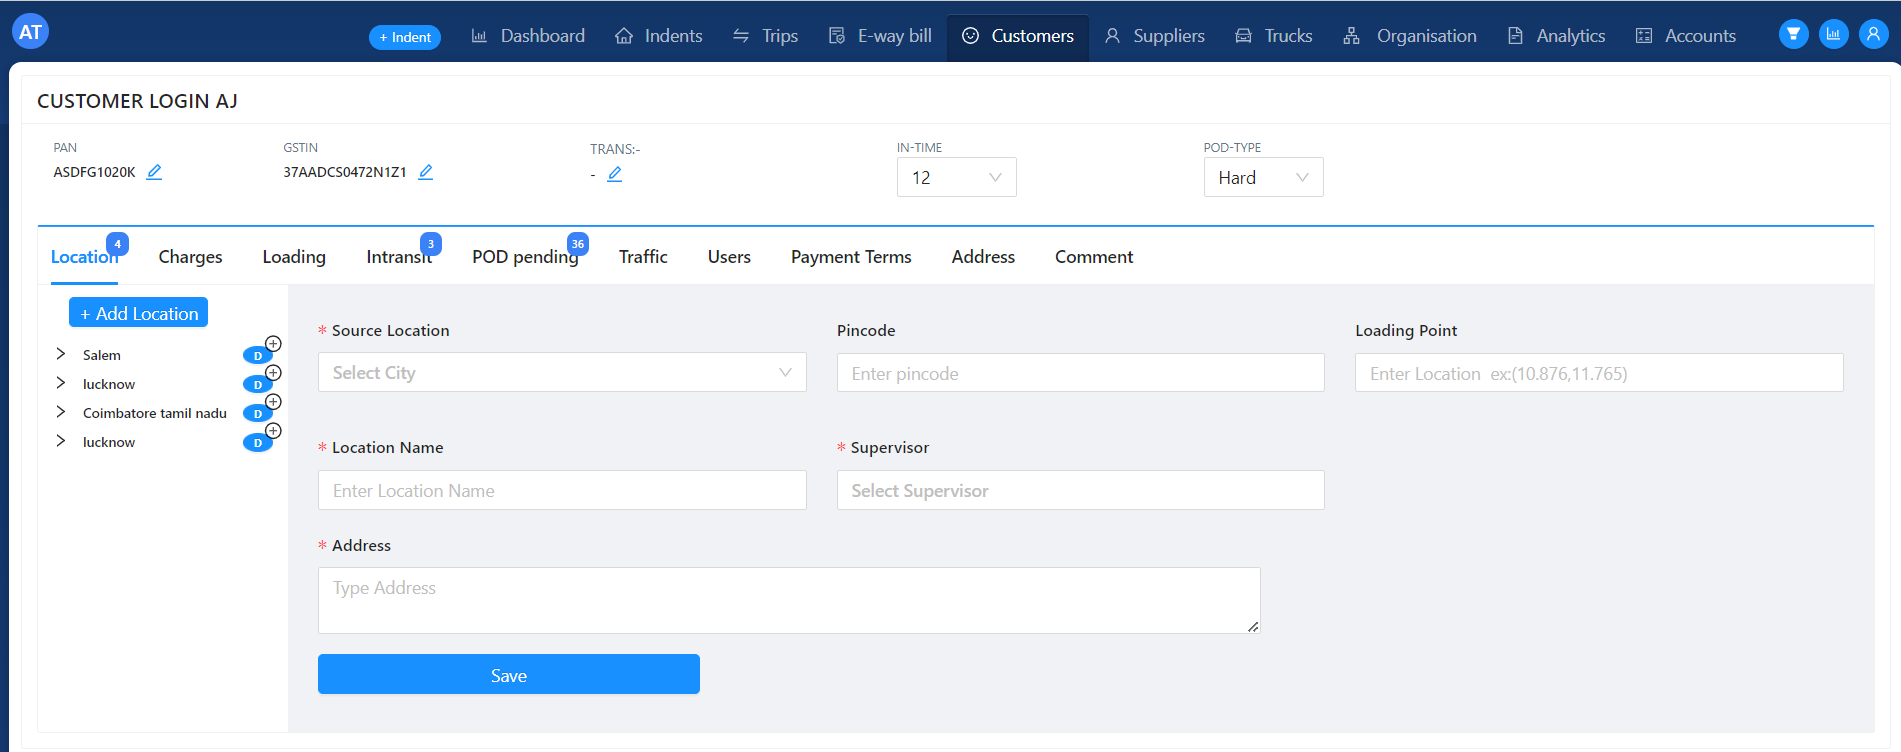
+In the customer detail page, after creating a lane, users have the ability to add multiple unloading points by clicking on the destination name and selecting Add row.Upon clicking the destination name, the system displays details related to the destination, including the city name, distance in kilometers (KM), estimated trip days, address, and location. Below these details, there is an Add Row button. By clicking this button, users can add multiple destination rows, allowing them to include multiple unloading points for the selected lane.
+
+
+
+After clicking the Add Row button, the Add Lane module will appear, providing users with the ability to update the unloading point location. In the "Destination Location" field, users can input the specific location of the unloading point. The "Location name" field allows users to assign a display name for the unloading point. The PIN code of the unloading point can be entered in the "Pincode" field. For precise location coordination, users can input the latitude and longitude values in the "Location point" field (e.g., 10.876, 11.765). The distance in kilometers (KM) and the estimated trip duration in days can be updated in the "KM" and "Trip day" fields and address of the unloading point can be entered in the "Unloading point Address" field.
+
+Once all the necessary data is updated, users can click the "Submit" button. Upon clicking, the entered data will be created as a lane destination, effectively adding the new unloading point to the lane.
+
+
+### **As Adhoc Indents**
+
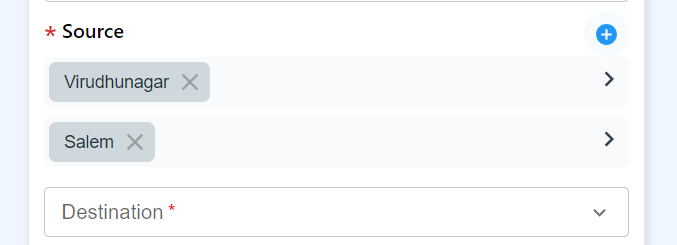
+Indents that are not created from customer lanes are referred to as Adhoc Indents. These adhoc lanes can be created by searching for city names in both the Source and Destination columns. After selecting the first city name, a "+" button will appear at the top of the source name field. Clicking on the "+" button enables users to search for city names in the city section. Upon entering a valid city name, a list of suggested city names will be displayed, allowing users to select the correct city for their loading or unloading location.
+
+
+
+
+After updating all the necessary data, the user can create an indent by clicking the "Create Indent" button located at the bottom of the page. Upon clicking this button, an indent will be generated based on the user's provided data, and it will be displayed in the indent tab.
+
+
+
+