Revision: f6c255d38f
Edited Create Direct Load 003
@@ -1 +1,265 @@
-No Content
+
+
+If the user has all the necessary information about upcoming trips, such as the truck number, supplier, and other details, they can utilize the "Create Direct Load" feature to directly create trips without going through the indent creation process. This feature is available in a dedicated tab and can be accessed by employees who have the necessary permissions to create indents.
+
+By following these instructions and providing the required information, the user can quickly and efficiently create the desired trips.
+
+It streamlines the process and allows for the direct creation of trips based on the provided information, saving time and effort.
+
+By utilizing the "Create Direct Load" feature and adhering to the instructions provided, users can easily and effectively create trips without the need for an indent, simplifying their workflow and enhancing operational efficiency.
+
+
+
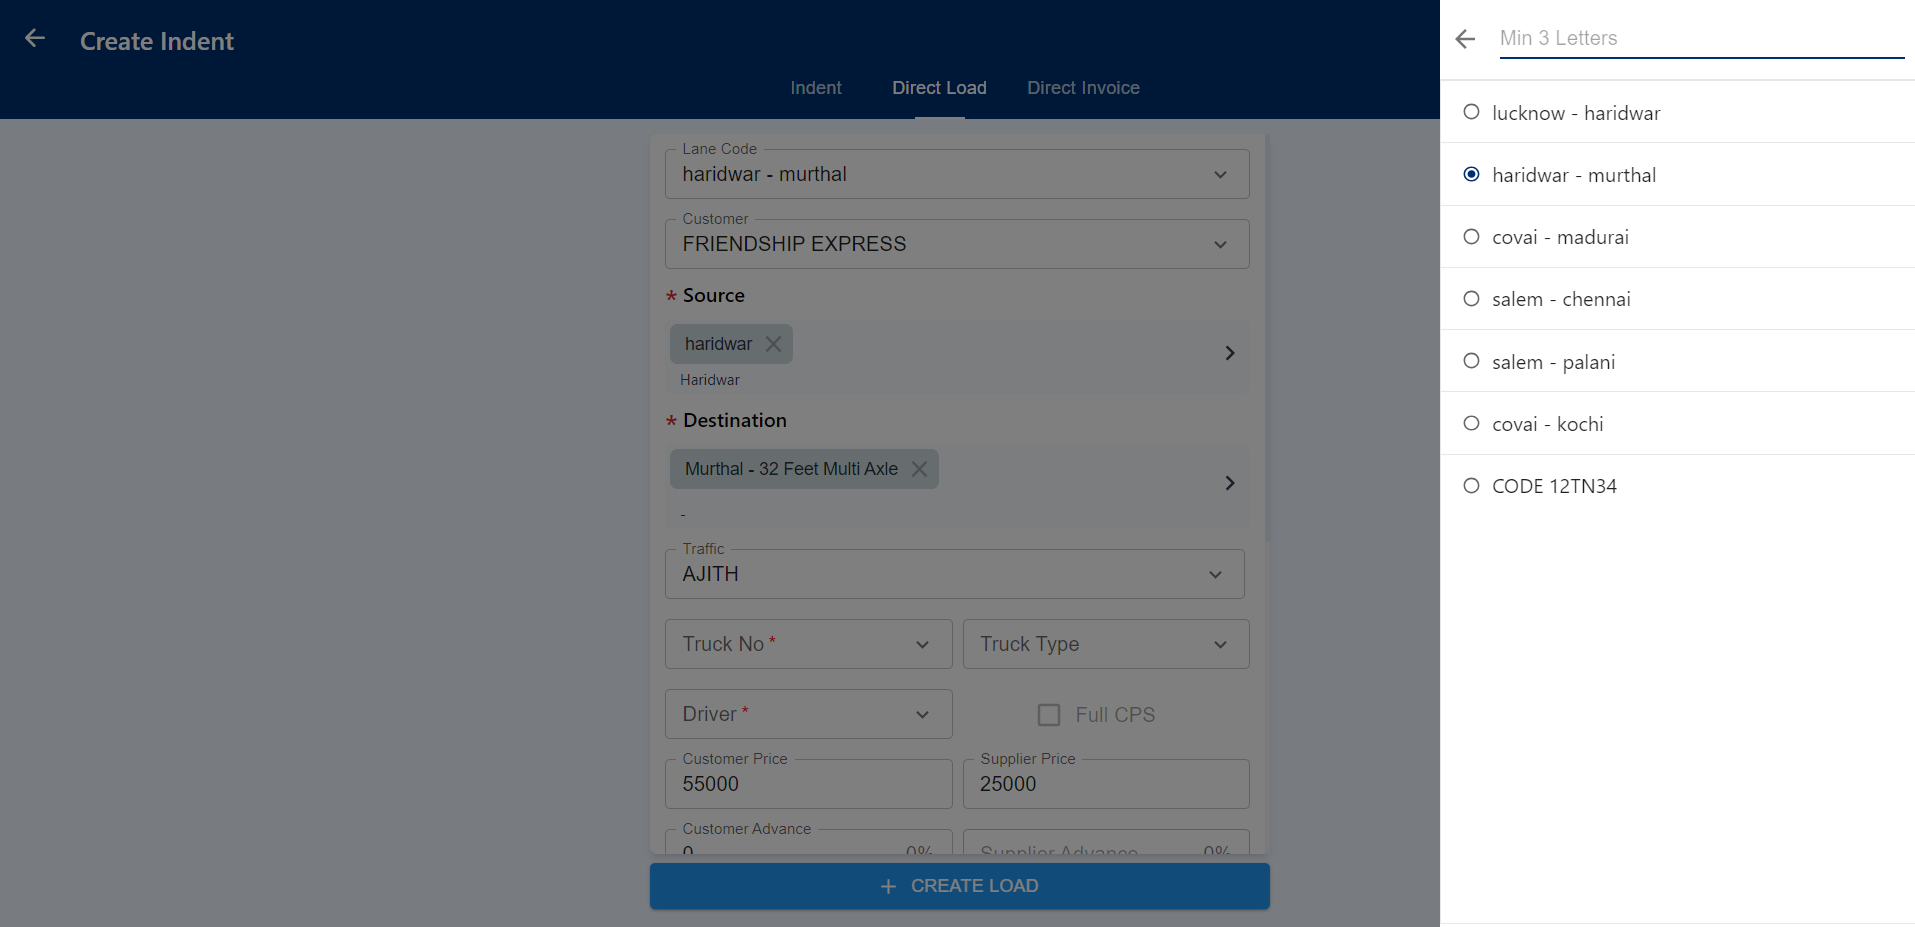
+**Lane Code**
+
+While clicking on this field, Lane codes will display on the right, based on configured in the organization > Lane tab. The admin has access to create Lane codes. First users need to create Customer Lanes as existing. After creating, move to the Organization tab and navigate to the Lane tab. In the Lane tab, all the created Lanes will be listed, and categorized by customer names. Users can add a code name in the "Code" column, allowing for any applicable data type. Users can add by clicking the edit button in the Code column. After updating users are able to create Indents by selecting lane code. Admin and BM role employees only Had access to Editing Lane Code in the Organization tab.
+
+
+
+After selecting the indent, the system will automatically populate certain fields such as customer price, supplier price, source name, destination name, traffic employee name, and POD (Proof of Delivery) type. This saves the user's time and effort in filling out repetitive information.
+
+Next, the user can proceed to fill in additional details such as the supplier, truck number, and driver number. Once all the necessary data has been updated, the user can create a direct load by selecting the "Create Load" button. This action triggers the creation of the load based on the provided information.
+
+To undo any incorrect updates or clear all the entered data, the user can click on the "Reset" button located at the top right of the page. By clicking this button, all the fields that were previously updated will be cleared, reverting back to their original state. This allows the user to start afresh and ensure that any erroneous or undesired changes are undone.
+
+
+
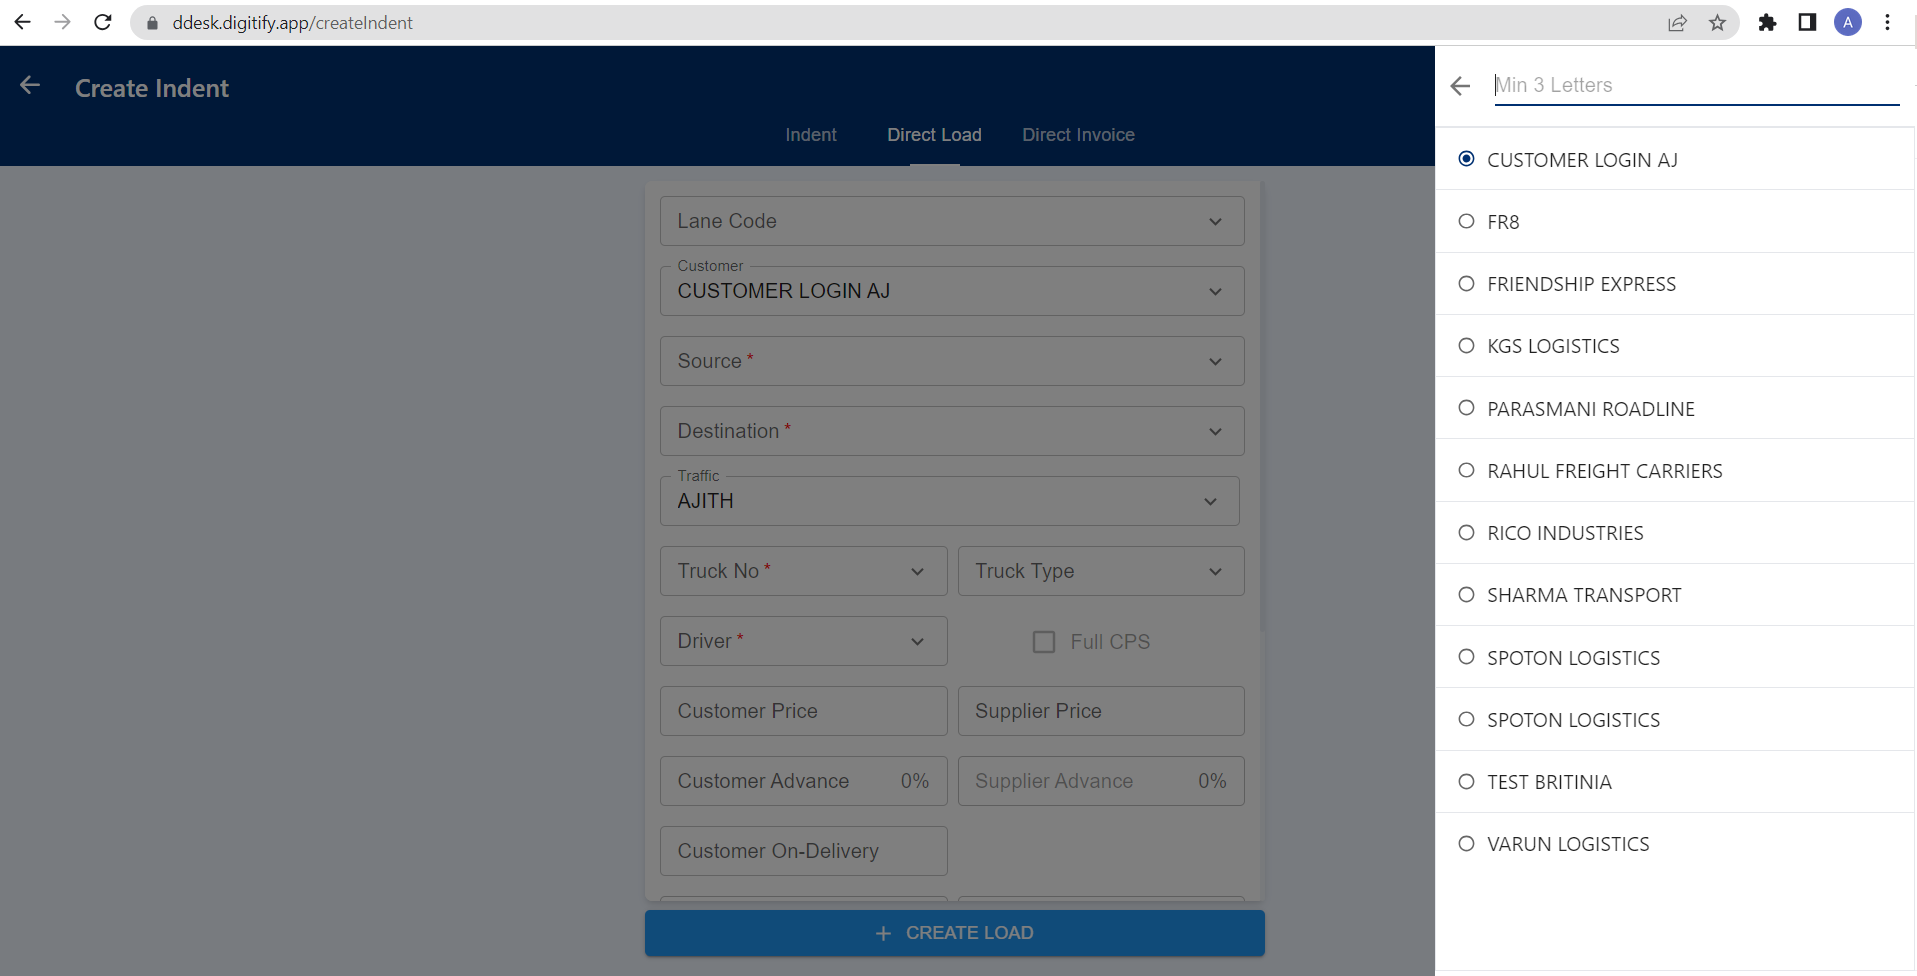
+**Customer**
+
+User can also able to create direct load by selecting customer names as like indent creation. This field displays all Customer names created in the company. While clicking on the Customer field It displays all customer names on the right, and also users are able to select customers by searching their names in the search field on top of the customer names.
+
+
+
+When searching for a customer name in the search field, if the name does not exist, an Add button will be displayed exclusively for users with the admin and BM roles. They can click on the Add button to access the add customer page. In the add customer page, they can update all the required data such as Customer Name, Customer Short Name, PAN No, Customer Mobile, and GSTIN. This allows the admin to create a new customer entry with their relevant information.
+
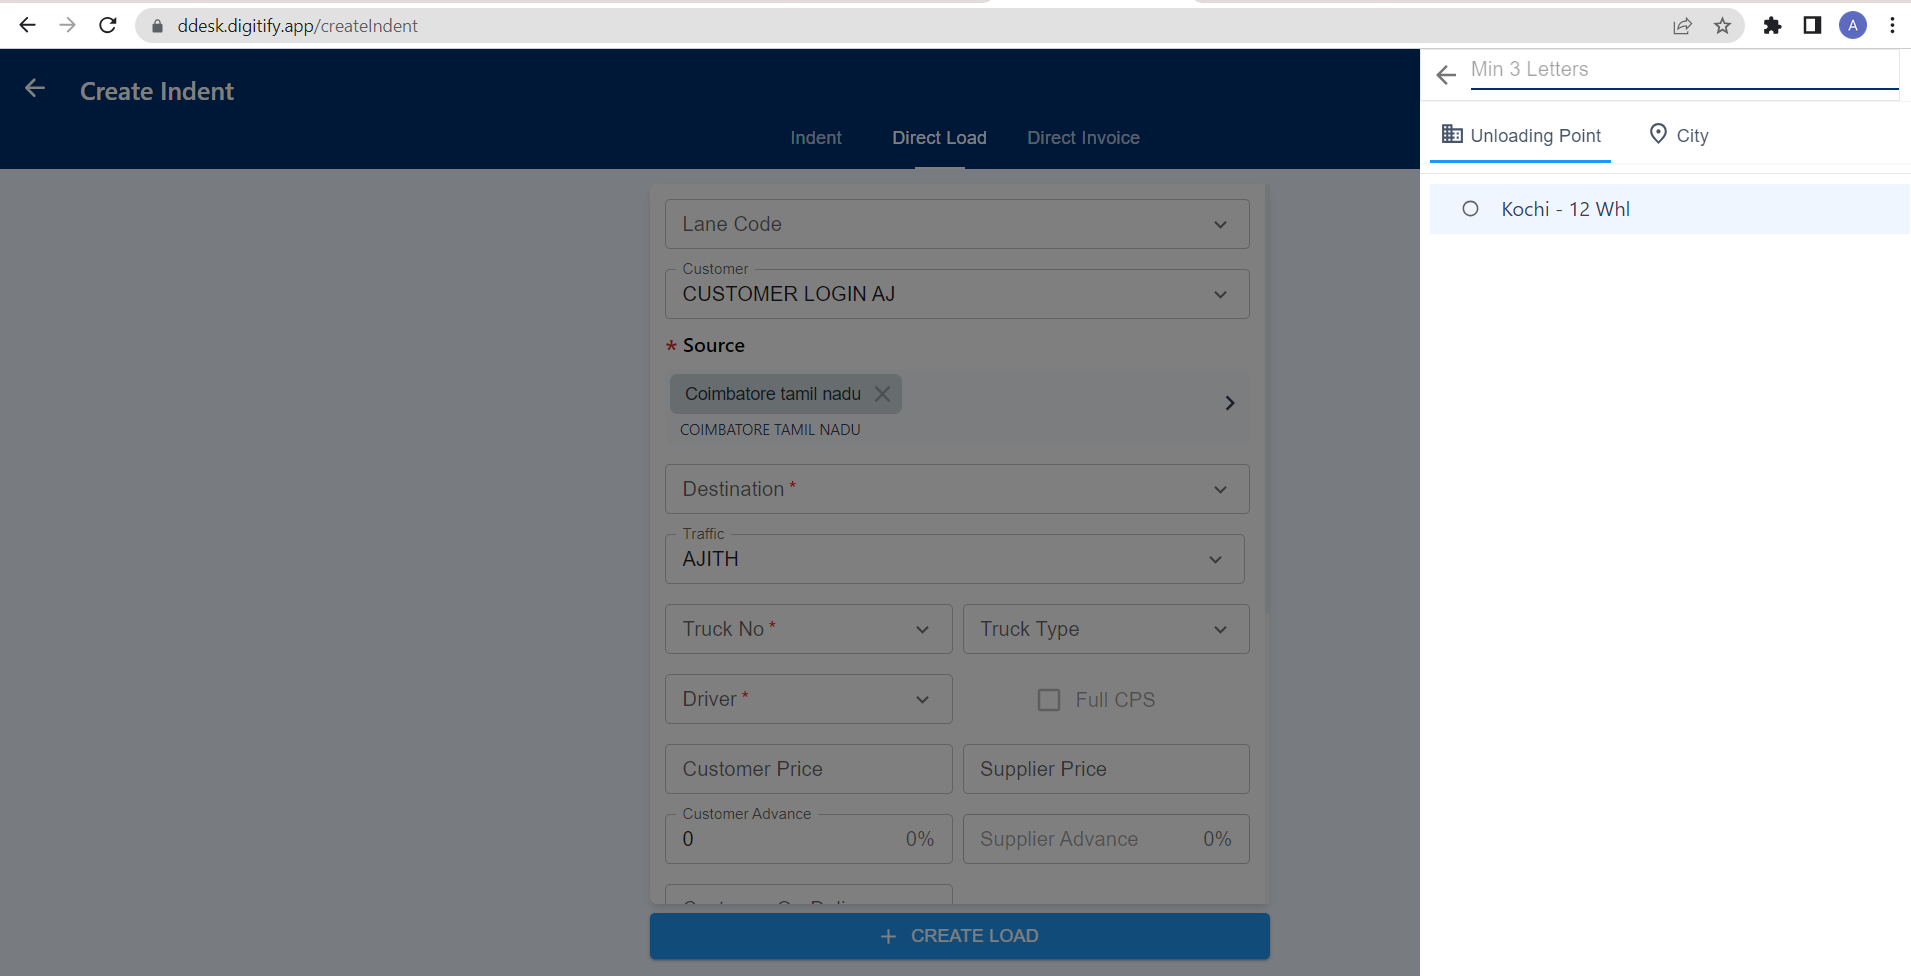
+**Source**
+
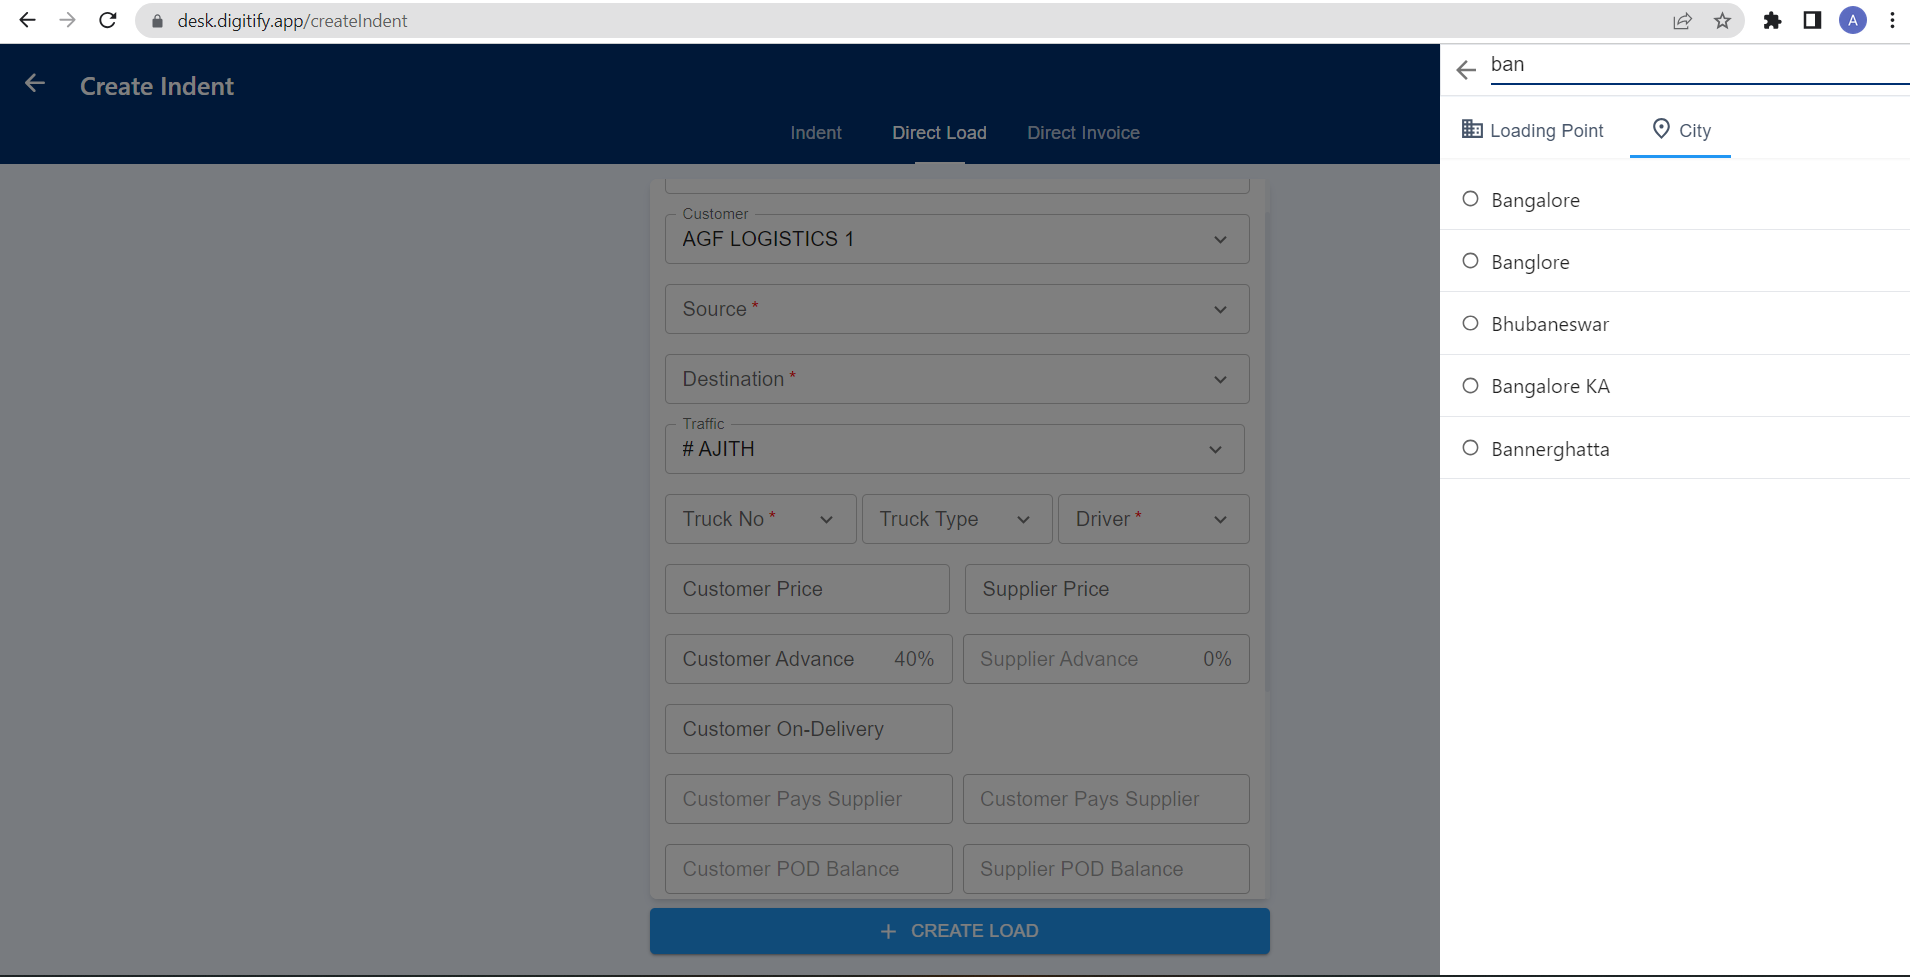
+While clicking the Source field, two sections are displayed: Loading Points and City. The Loading Points section shows the names of loading points categorized under their respective branch names. The list of loading points is based on the Lanes created in the customer detail page. Users also have the option to search for specific loading points by entering their names in the search field. In the Cities section, all city names are displayed, and users can search for specific cities using the search field as well.
+
+
+
+When searching for loading point names, if a match is not found, the system automatically switches to the City section and displays city names based on the user's search. The configuration of displaying loading point names under their respective branch names can be done in the Organization tab by the admin.
+
+**Destination**
+
+The Destination field functions similarly to the Source field by displaying Unloading points based on the configuration set in the customer lane under the corresponding loading point. Clicking on the Destination field presents a list of Unloading points, accompanied by their associated truck-type names. Users have the flexibility to select their desired destination points using the search field located at the top of the Unloading Points list.
+
+Users are granted the capability to edit or modify the selected loading and unloading points by clicking on the cancel symbol next to their respective names. It is important to note that if the Source is an adhoc city, the destination should also be an adhoc city. If the user has selected the Source from the customer lane, they are not allowed to create an unloading point as adhoc. In summary, the Destination field operates similarly to the Source field, displaying a list of Unloading points with truck-type names. Users can select destinations, search for specific points, and modify their choices if necessary. Adhoc city restrictions apply based on the Source selection.
+
+
+
+**Creating Multipoint Trips (Both in Loading and Unloading)**
+
+User can able to create multi loading and multi unloading points in two way
+
+1. Configure in Customer Lane (Multi Unloading Points)
+
+2. As Adhoc
+
+**Configure in Customer Lane (Multi Unloading Points)**
+
+In the customer detail page, after creating a lane, users have the ability to add multiple unloading points by clicking on the destination name and selecting Add row. Upon clicking the destination name, the system displays details related to the destination, including the city name, distance in kilometers (KM), estimated trip days, address, and location. Below these details, there is an Add Row button. By clicking this button, users can add multiple destination rows, allowing them to include multiple unloading points for the selected lane.
+
+After clicking the Add Row button, the Add Lane module will appear, providing users with the ability to update the unloading point location. In the "Destination Location" field, users can input the specific location of the unloading point. The "Location name" field allows users to assign a display name for the unloading point. The PIN code of the unloading point can be entered in the "Pin code" field. For precise location coordination, users can input the latitude and longitude values in the "Location point" field (e.g., 10.876, 11.765). The distance in kilometers (KM) and the estimated trip duration in days can be updated in the "KM" and "Trip day" fields and the address of the unloading point can be entered in the "Unloading point Address" field.
+
+Once all the necessary data is updated, users can click the "Submit" button. Upon clicking, the entered data in the "Add Lane" module will be created as a lane destination, effectively adding the new unloading point to the lane.
+
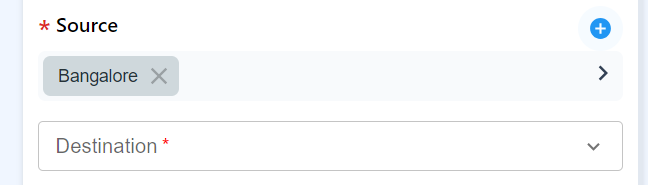
+**As Adhoc**
+
+Trips that are not created from customer lanes are referred to as Adhoc trips. These adhoc lanes can be created by searching for city names in both the Source and Destination columns. After selecting the first city name, a "Pulse" button will appear at the top of the source name field. Clicking on the "Pulse" button enables users to search for city names in the city section. Upon entering a valid city name, a list of suggested city names will be displayed, allowing users to select the correct city for their loading or unloading location. In this manner, users can select multiple loading and unloading points based on their specific requirements.
+
+
+
+
+
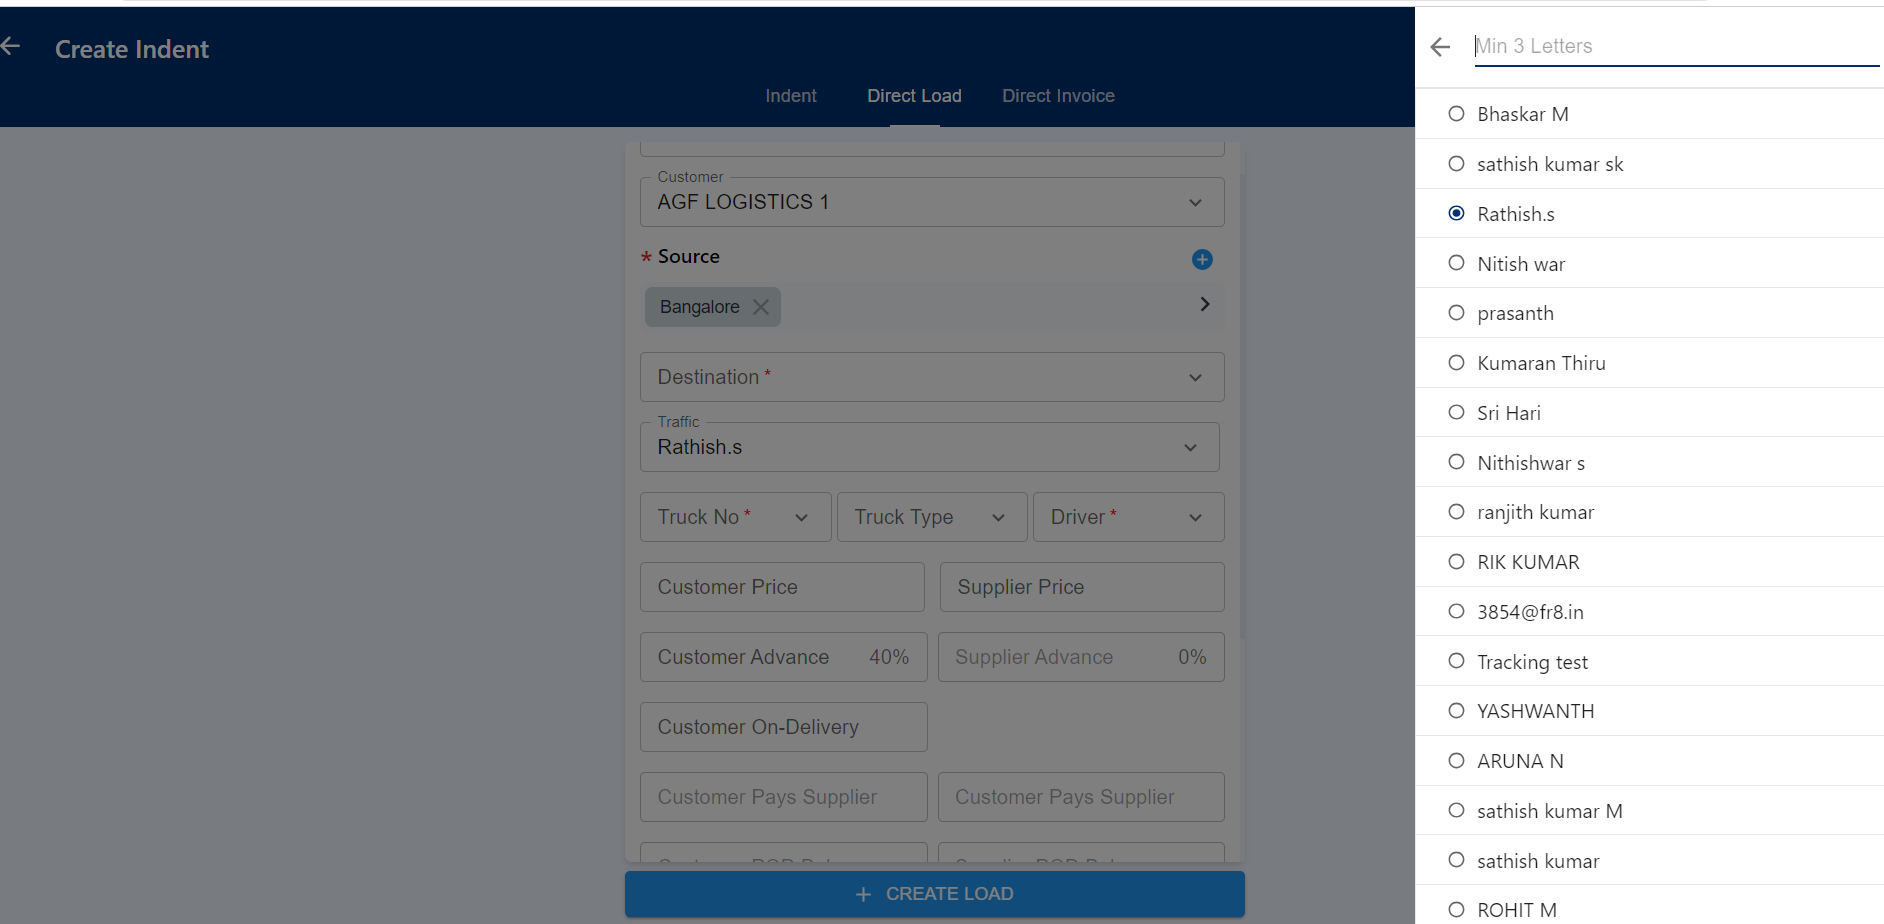
+**Traffic**
+
+While clicking on this field, displays a traffic role employee list where users can allow them to allocate traffic employees for this trip. After customer selected traffic employees will auto fill based on customer branch. Users are able to change traffic employees based on their needs by selecting any of them in the displaying list.
+
+The created trips will be displayed exclusively to the assigned employees in the traffic role. This means that only the employees who have been designated with the traffic role will have access to view the information about the created trips. The system ensures that the trip details are visible only to the relevant personnel who are responsible for managing and coordinating the transportation operations.
+
+
+
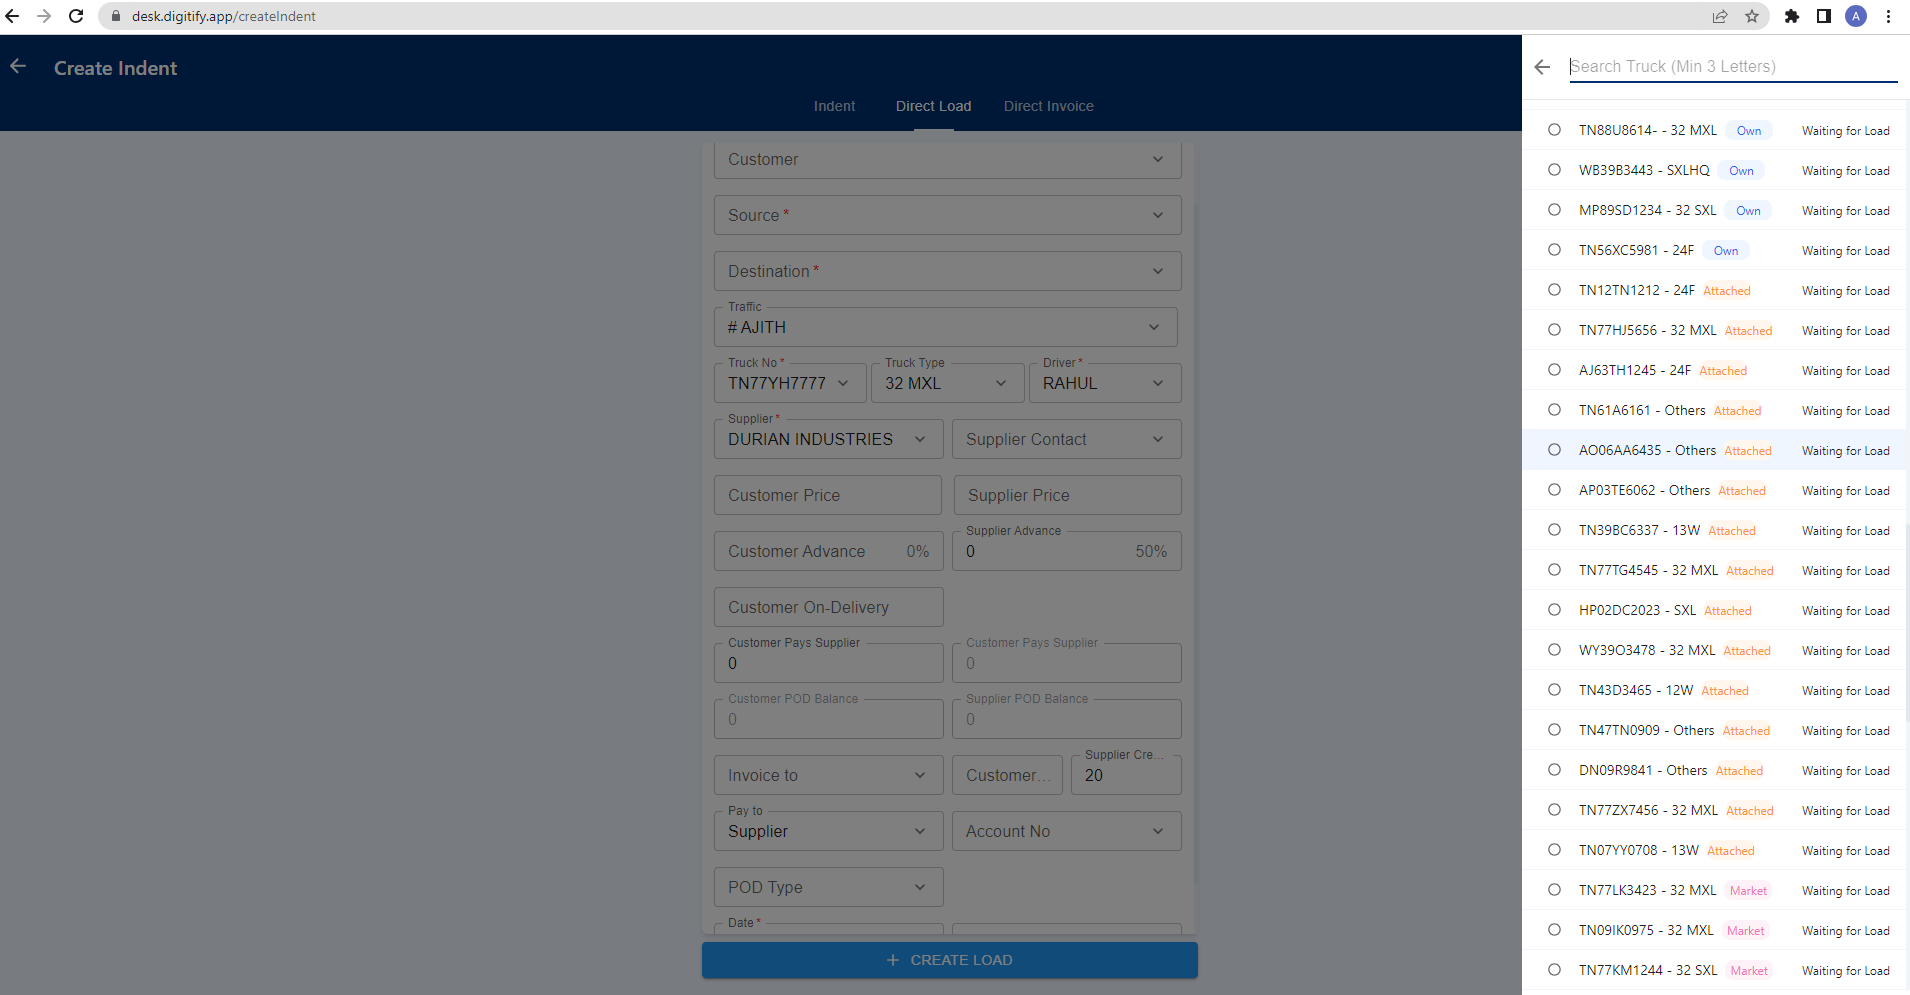
+**Truck No**
+
+In this system, the user has the flexibility to select a truck for the trip. The selection includes all categories of trucks, namely Own, Attached, and Market trucks. The user can also search for a specific truck by entering its truck number.
+
+However, the user is restricted to assign only those trucks that are in "In Transit," "Unloading," or "Waiting for Load" status. Trucks with "Confirmed" or "Reported at Source" status are not available for assignment to trips.
+
+
+
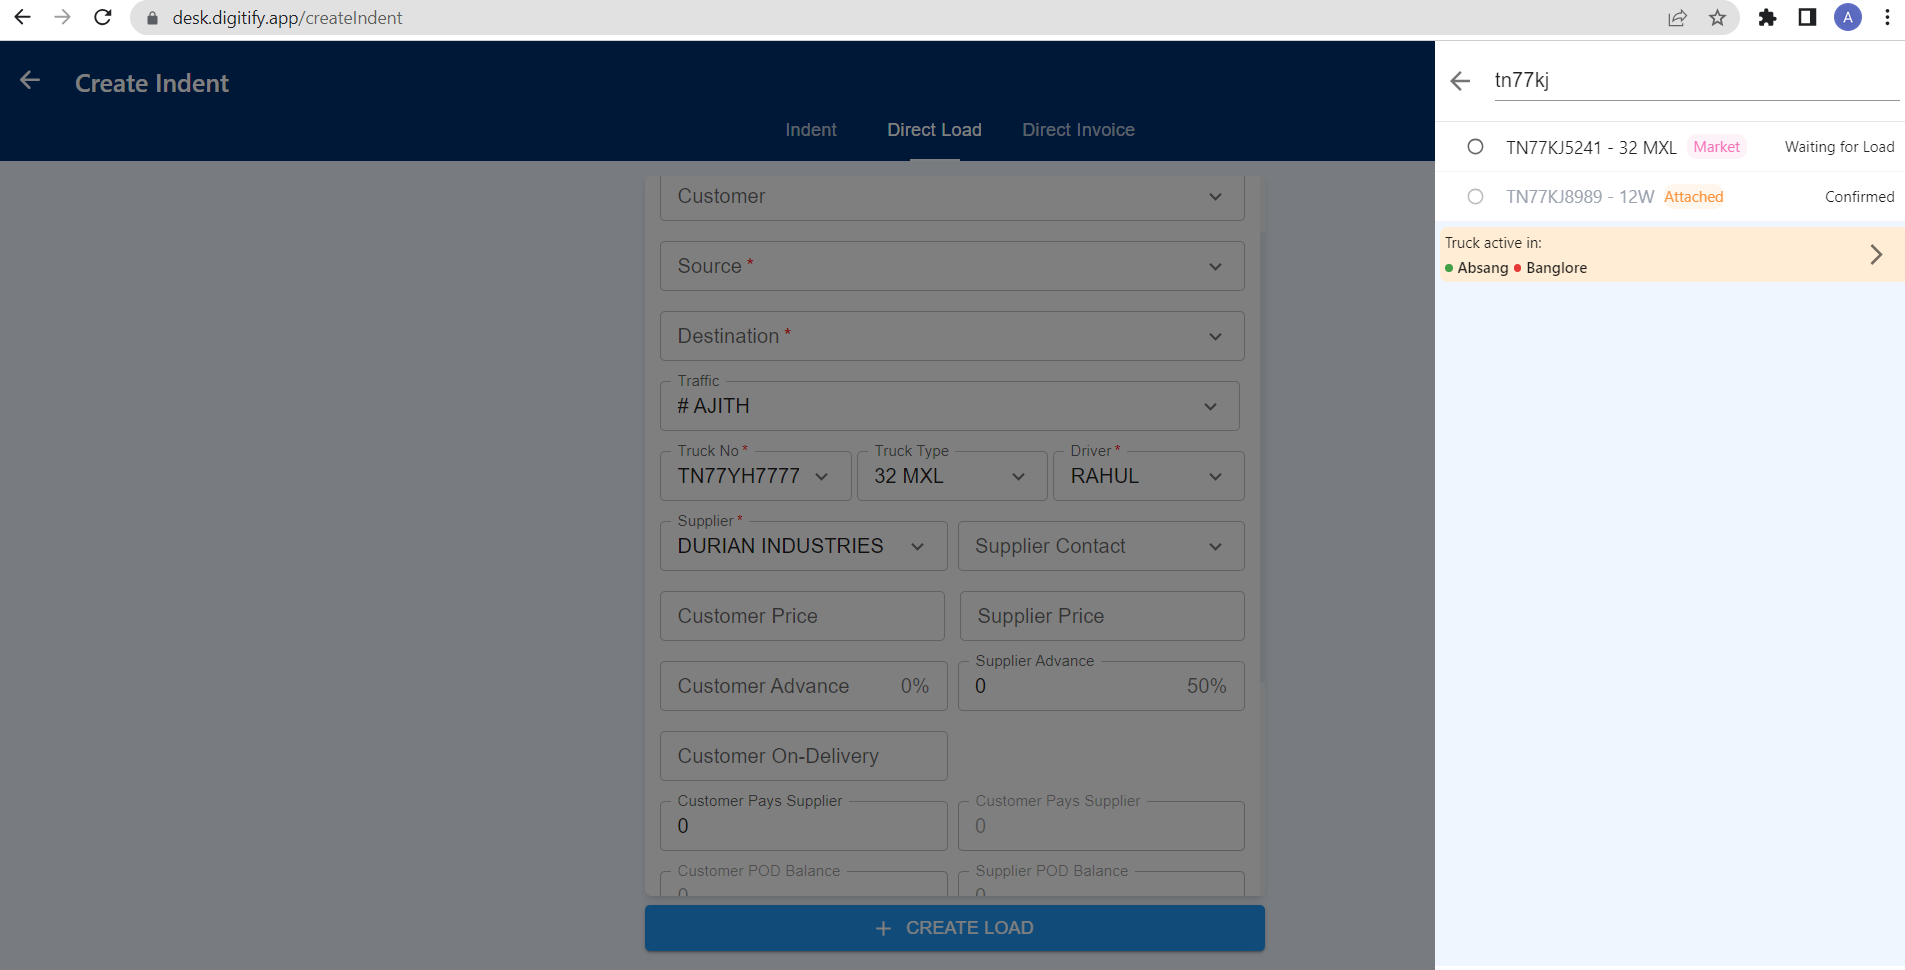
+When the user selects a truck in "Confirmed" or "Reported at Source" status, the system displays the trip's source and destination below the truck number, along with a navigation option. By clicking on this option, the user can navigate to the truck's ongoing trip detail page, which provides detailed information about the truck's current trip status. This feature allows the user to efficiently track and manage the ongoing trips of the selected trucks.
+
+
+
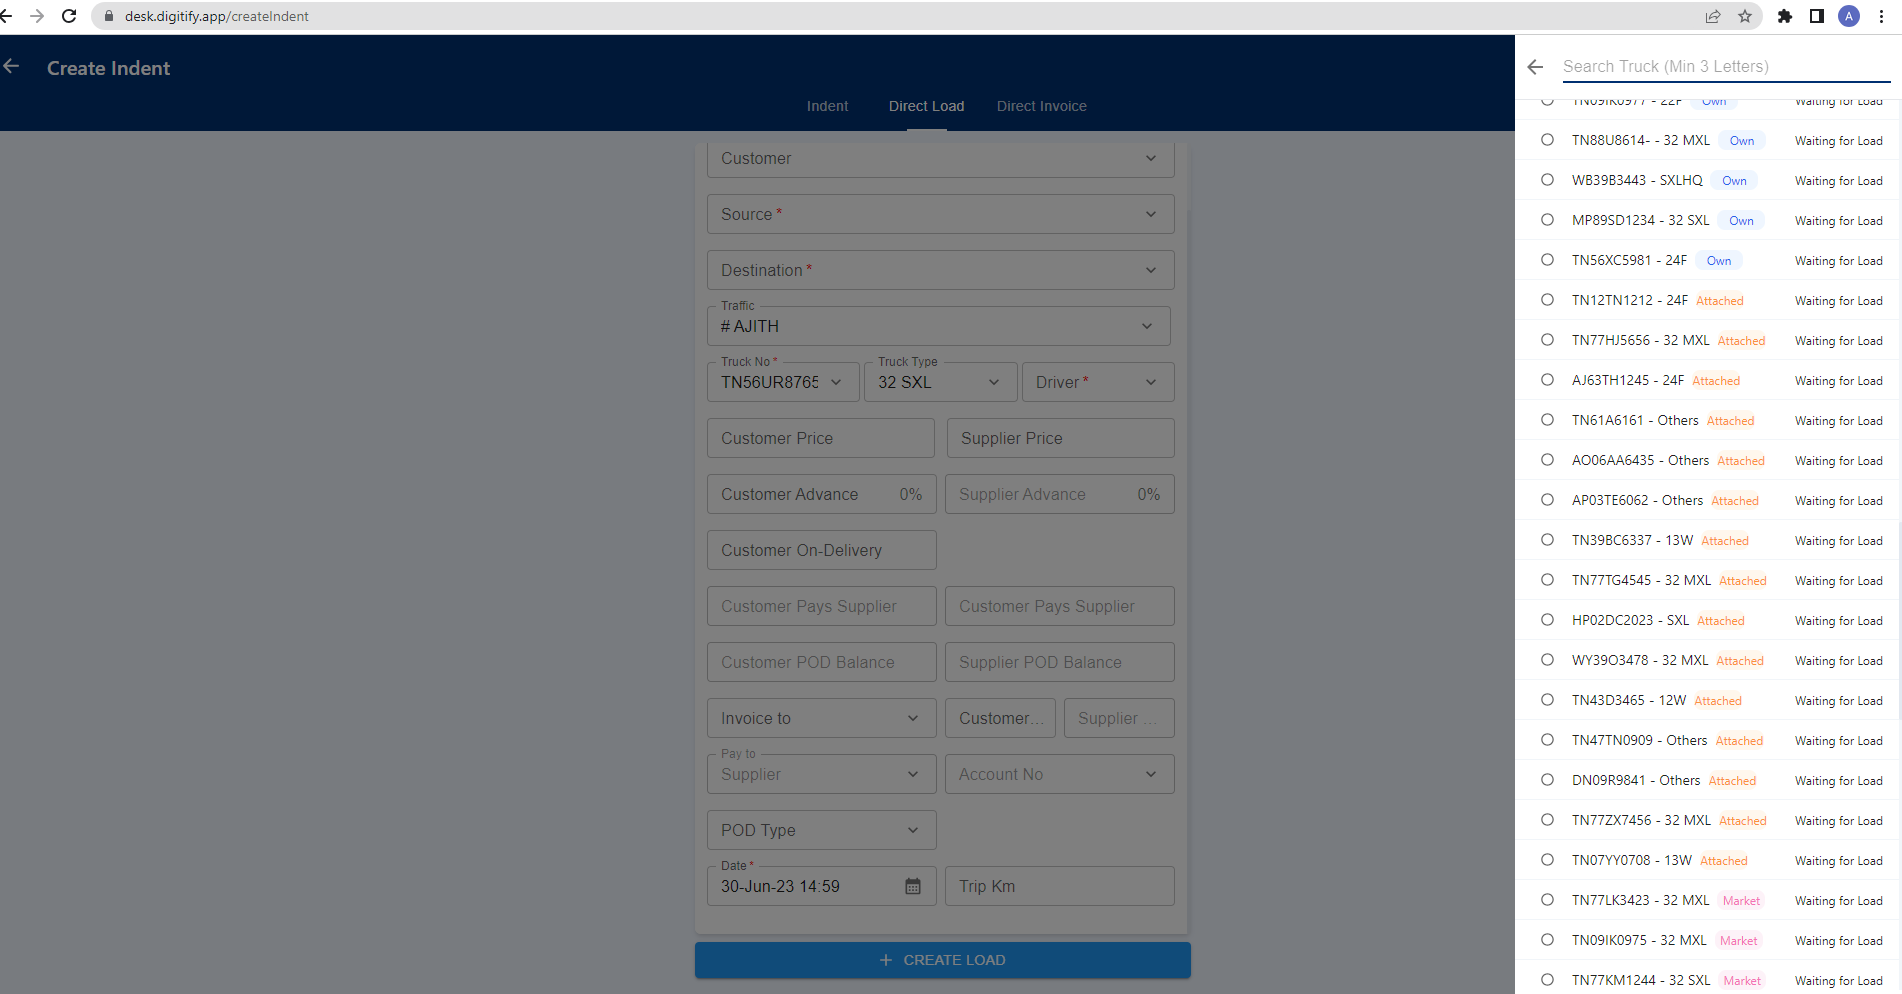
+If the searched truck is not found in the system, an "Add" button will be displayed, allowing the user to add a new truck by entering the truck details. When the user adds a new truck, the system will automatically populate the truck field with the truck type selected for the newly created truck. This feature ensures that the user can seamlessly add and associate the newly created truck with the current trip by automatically filling in the appropriate truck type.
+
+[https://www.awesomescreenshot.com/video/18763261?key=400c80862eb4f58de3e7b1c21e927b80](https://www.awesomescreenshot.com/video/18763261?key=400c80862eb4f58de3e7b1c21e927b80)
+
+
+
+**Supplier**
+
+When the user clicks on the supplier field, a list of supplier names will be displayed, and the user can select a supplier from the list for creating the trip. If the truck is already configured with a supplier, that supplier will be auto-filled in the supplier field. However, the user has the flexibility to change the supplier even if it is configured with the truck.
+
+
+
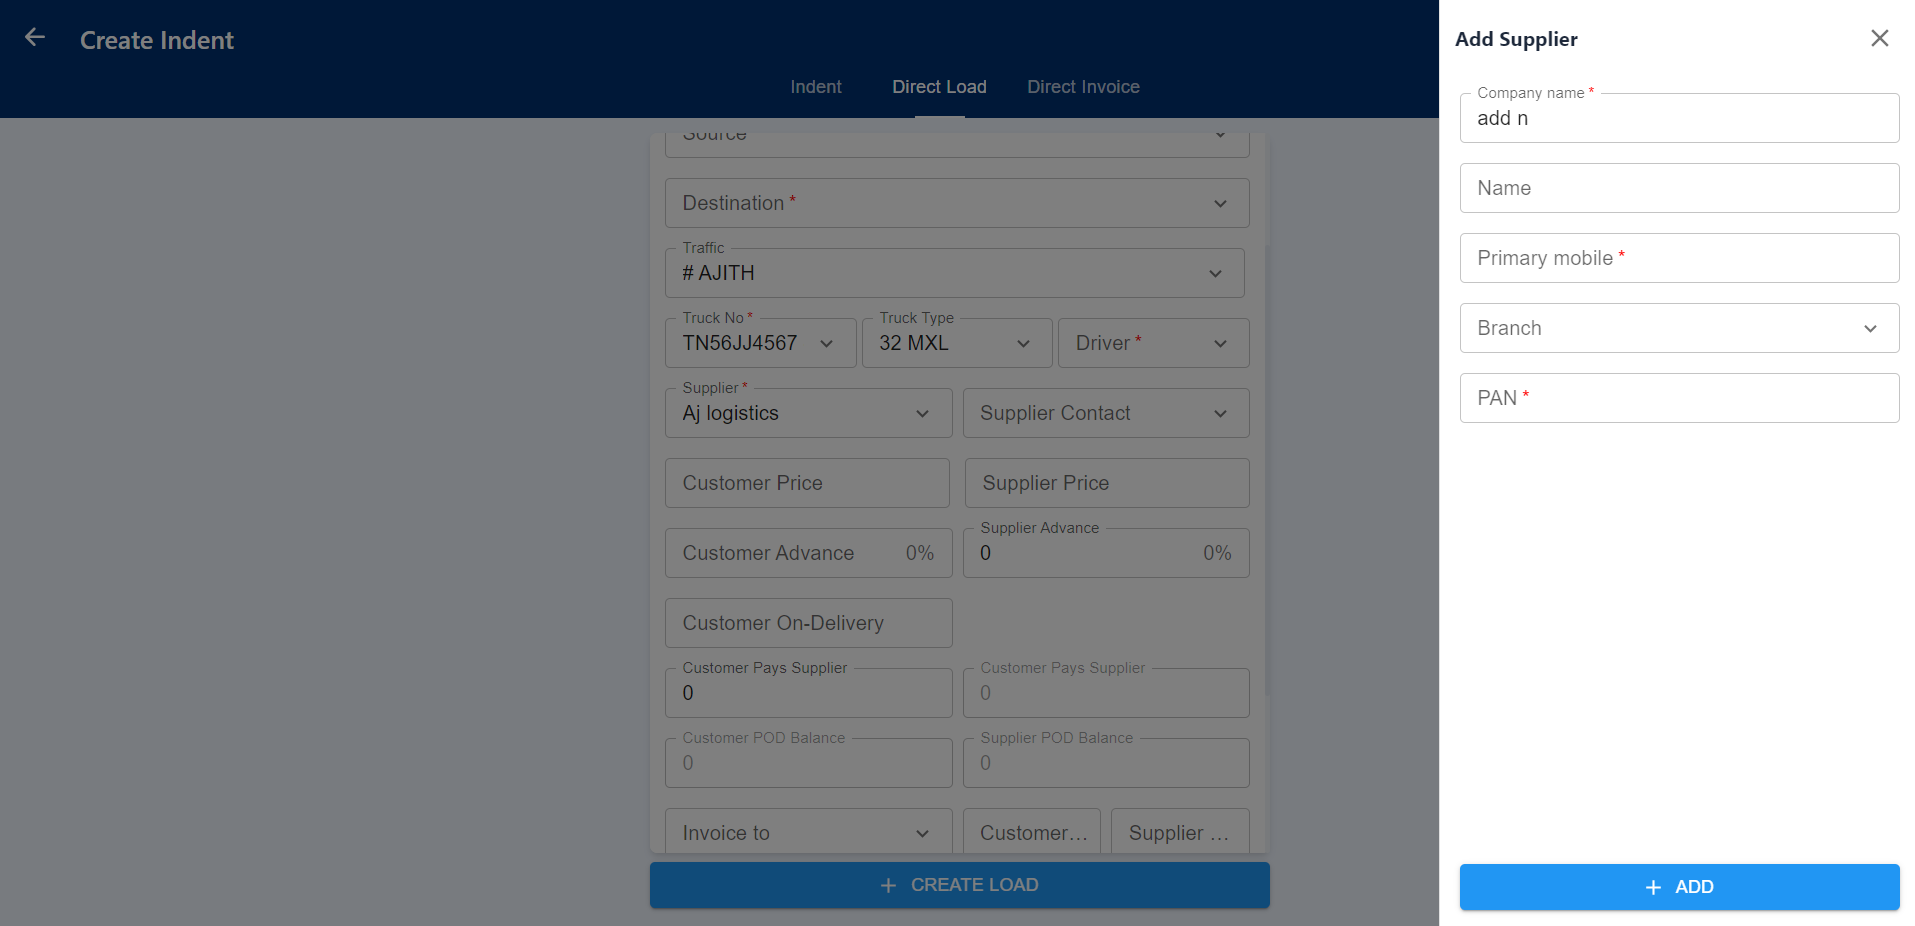
+Additionally, the user can manually search for a specific supplier by entering their name in the search field. If the supplier name does not exist in the search results, an "Add" button will be displayed. Clicking on this button will open the "Add Supplier" module on the right side of the screen. In this module, the user can enter details such as the company name, name of the supplier, primary mobile number, branch information, and PAN (Permanent Account Number).If the "Add" button for adding a new supplier is intended to be accessible only for users with the Admin role, it will be limited to those users. Only users with the Admin role will be able to see and use the "Add" button to create a new supplier entry. This restriction ensures that only authorized personnel with administrative privileges can add new suppliers to the system. Other users without the Admin role will not see the "Add" button and will be limited to selecting existing suppliers from the available options.
+
+
+
+After filling in all the required data for the new supplier, clicking the "Add" button will create the new supplier entry, and it will be automatically filled in the supplier field, making it ready for selection in the trip creation process. This feature provides a convenient way for users to manage and add new suppliers on the go.
+
+In the supplier list, the system will only display active suppliers that are eligible for assignment to trips. If a supplier has been rejected or deactivated, they will not be available to assign to a trip. This ensures that only approved and active suppliers can be assigned to trips.
+
+
+
+If a supplier needs to be activated or reactivated to assign for a trip, the user with the appropriate permissions can make the supplier active again in the system. This process may involve reviewing and resolving any issues that led to the rejection of the supplier. Once the supplier's status is changed to active, they can be assigned to trips as needed.
+
+[https://www.awesomescreenshot.com/video/18764116?key=53a407aa1ad87f36fac784ffd0655ea5](https://www.awesomescreenshot.com/video/18764116?key=53a407aa1ad87f36fac784ffd0655ea5)
+
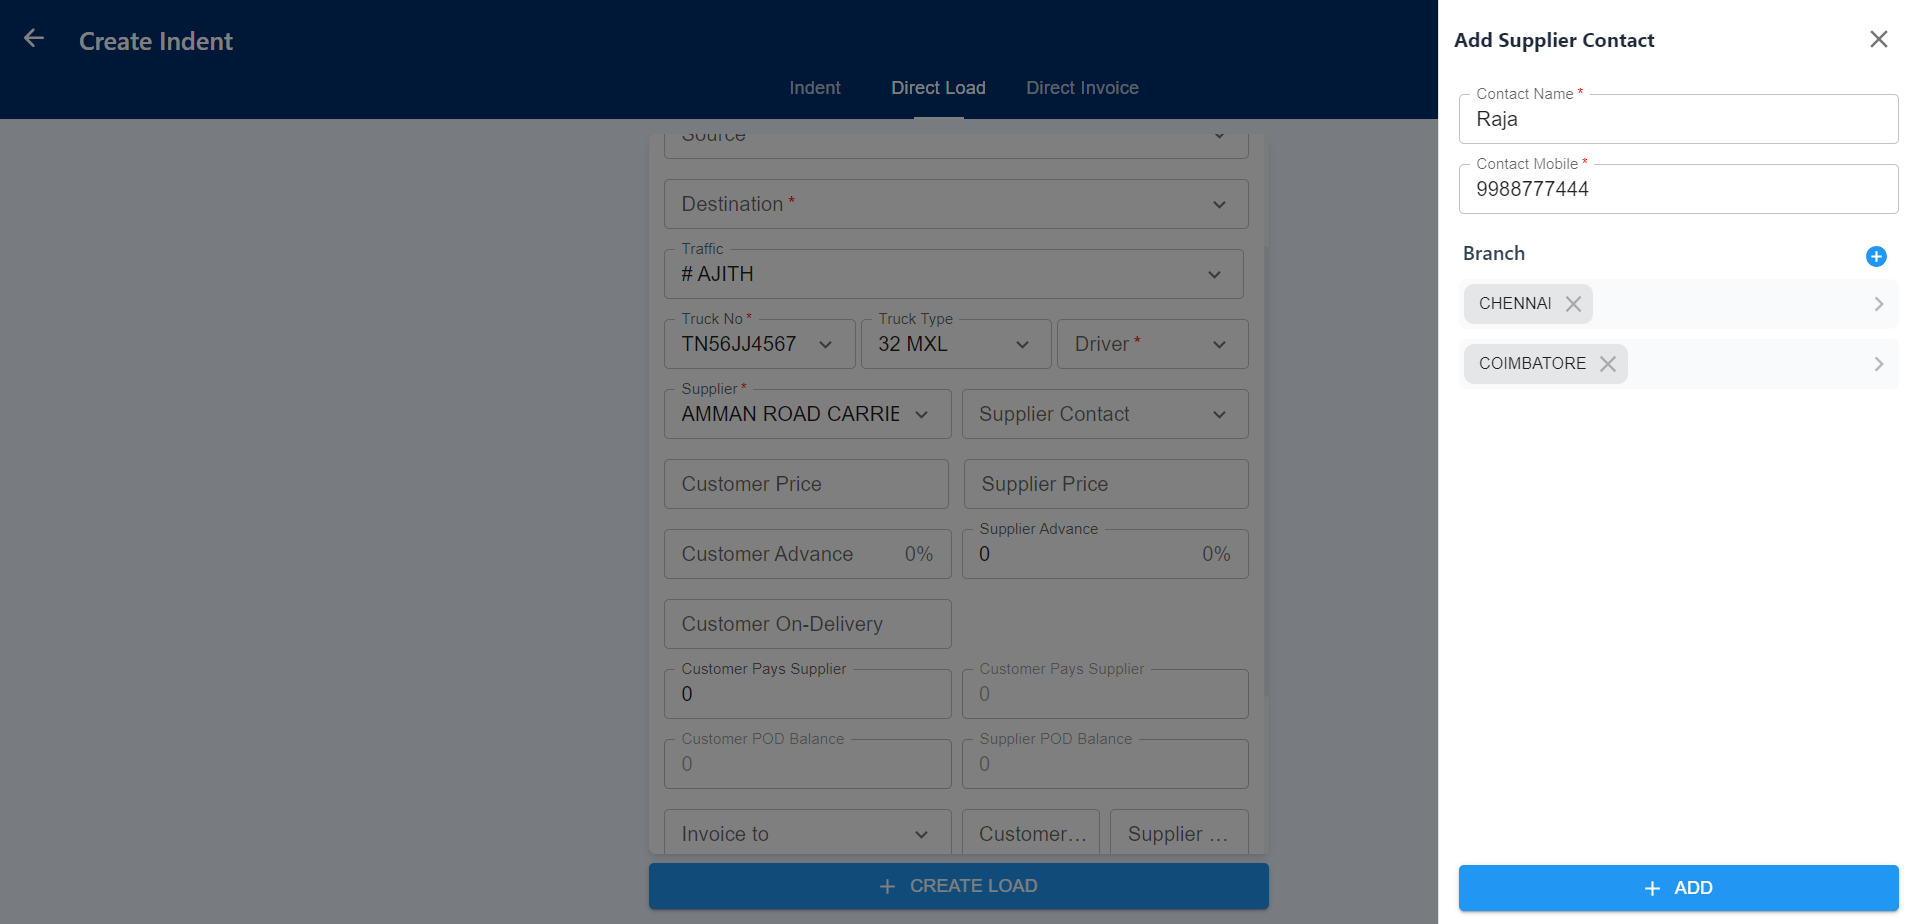
+**Supplier Contact**
+
+In this field, user can add supplier Contact details which can be used to contact suppliers easily. Supplier contact will be auto-filled while selecting a supplier. If supplier contact does not exist user can add it by clicking Add button in the contact while searching.
+
+
+
+If the system allows users to add multiple contacts for a supplier, the updated contacts will be displayed in the supplier contact field. This means that users can associate multiple contact details with a supplier, such as names, phone numbers, email addresses, and any other relevant information. By having the ability to add multiple contacts, users can ensure that they have accurate and comprehensive contact information for the supplier. After the update will display as shown in the below image.
+
+
+
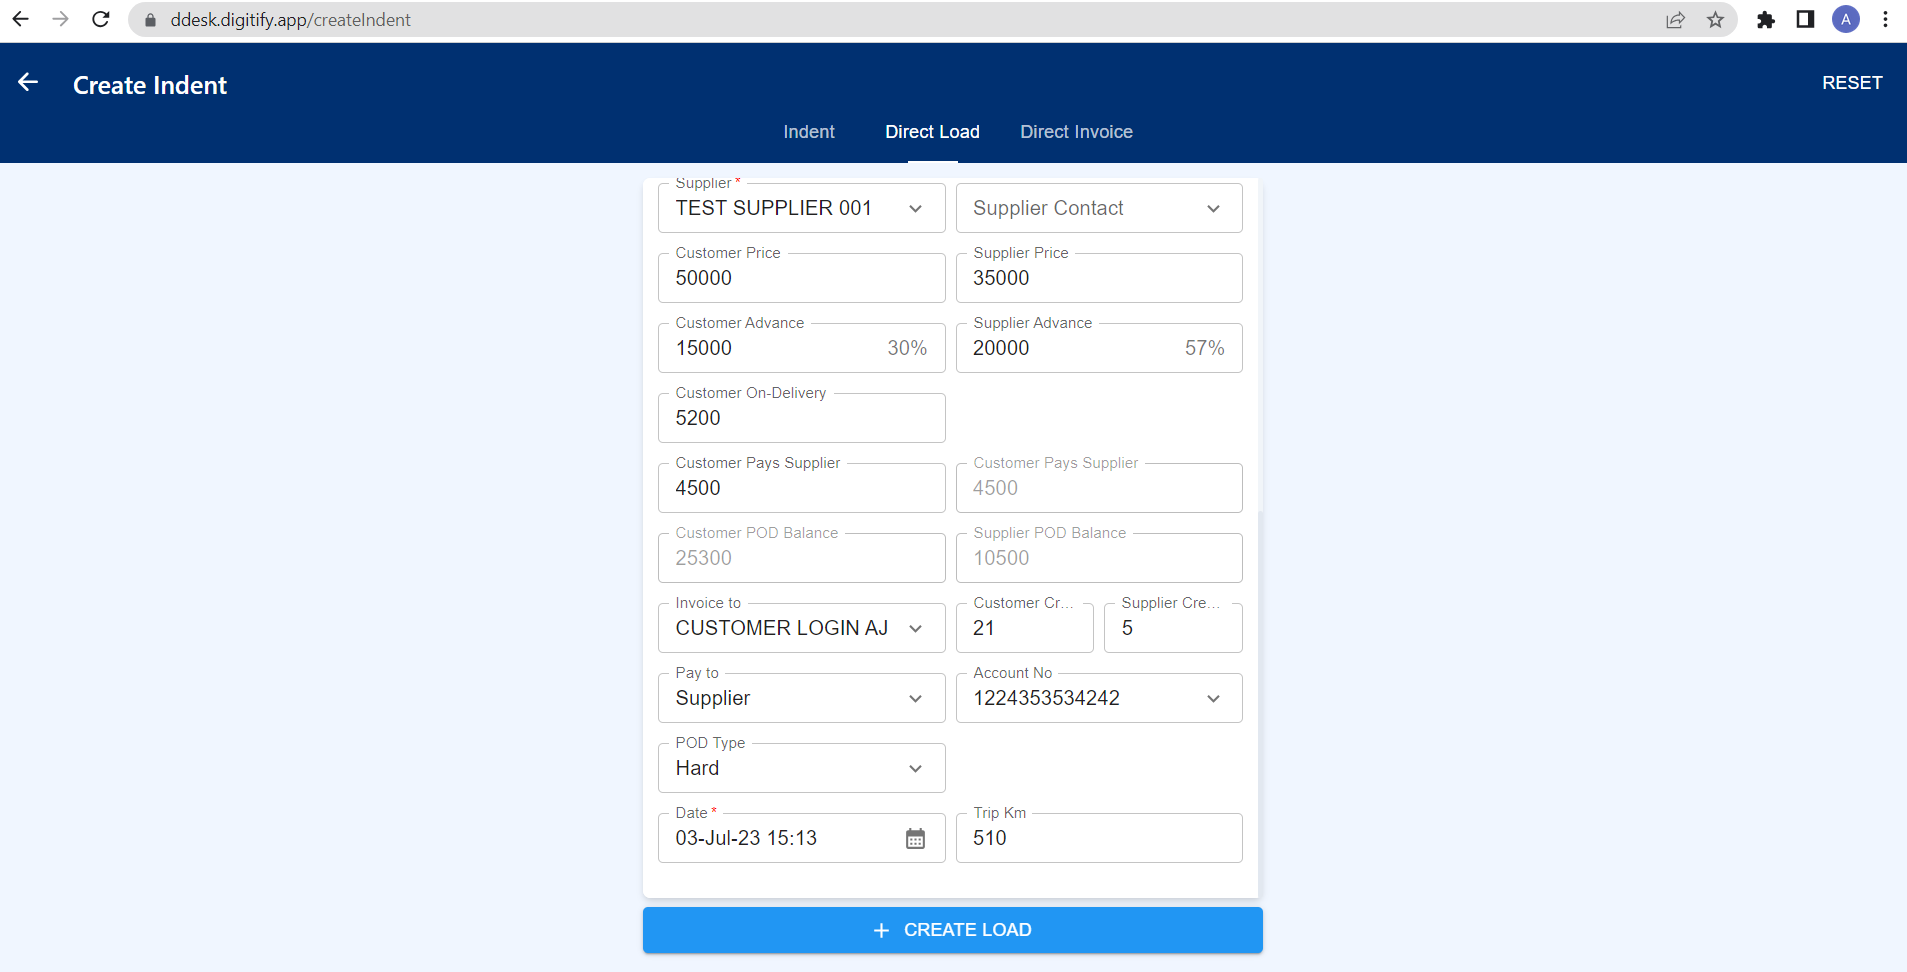
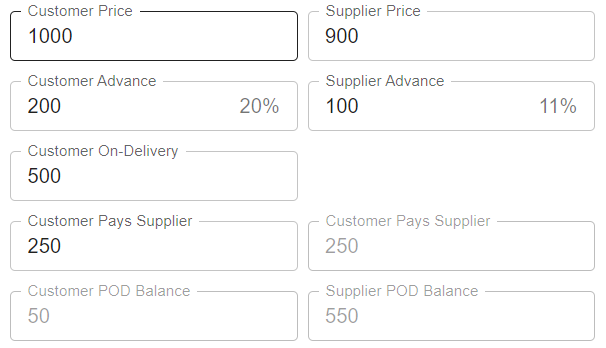
+**Customer Price and Supplier Price**
+
+In this system, the user can enter the prices for both the customer and the supplier by manually inputting the respective amounts. It's important to note that the supplier price is not validated against the customer price. This means that the user can update the supplier amount to be higher than the customer price. This type of payment, where the supplier price exceeds the customer price, is useful for adjusting any pending balances from previous trips.
+
+
+
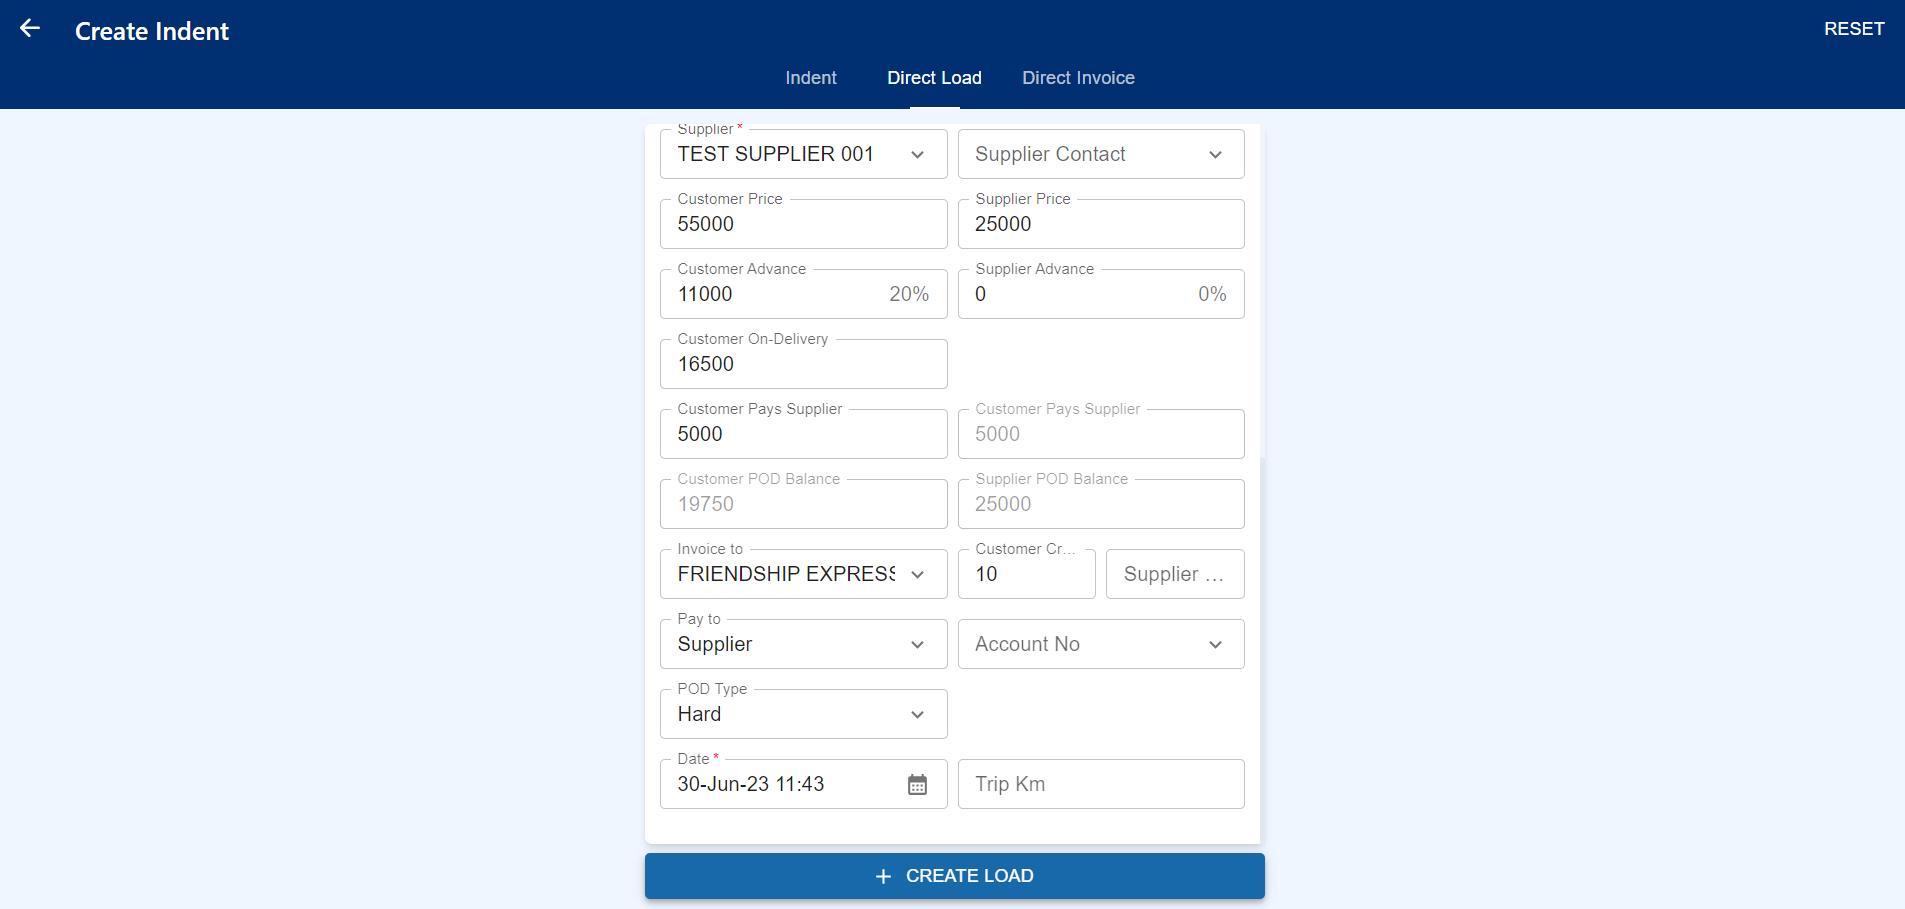
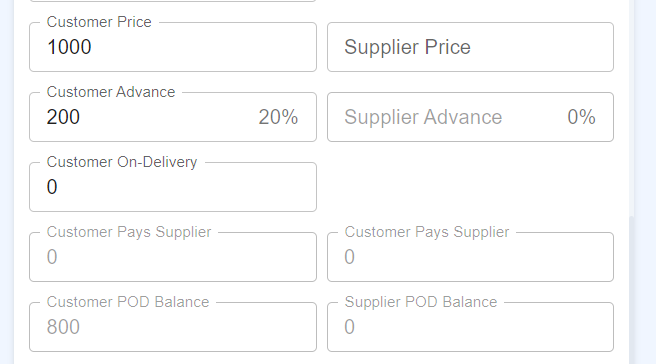
+**Customer Advance and Supplier Advance**
+
+In this field, the user can enter the advance amount that the customer will provide after loading. The advance amount will be calculated based on a percentage of the customer's total amount.
+
+For example, if the user sets the advance percentage as 20%, and the customer's total amount is Rs :1000, the calculated advance amount will be Rs:200 (20% of Rs:1000).
+
+This feature allows the user to easily determine the advance amount required from the customer and supplier that helps streamline the payment process by automating the calculation based on the specified percentage.
+
+
+
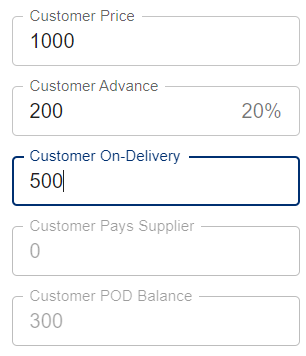
+**Customer On-Delivery**
+
+In this field, the user can make an entry for the amount that will be given by the customer after the trip is delivered. It is important to note that the entered amount can only be booked when the trip is in the "POD Pending" status.
+
+Once the trip is completed and marked as "POD Pending," the user can enter the specific amount that the customer will provide as payment. This allows for accurate record-keeping and tracking of the payment received from the customer after the trip has been successfully delivered.
+
+By restricting the booking of the amount to the "POD Pending" status, the system ensures that the payment entry is made at the appropriate stage of the trip process, providing a clear and organized workflow for managing customer payments.
+
+
+
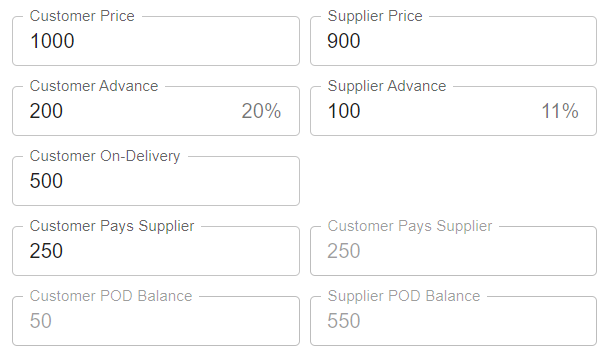
+**Customer Pays Supplier**
+
+In the system, the entered payment values are calculated for both the customer and the supplier. The user is allowed to enter payment amounts in the customer section, and whatever payment is entered in the customer section will be displayed in both sections.
+
+This type of payment signifies that the payment amount will be directly processed from the customer to the supplier without the involvement of the transporter as an intermediary. These payments can only be booked in the customer payment section.
+
+After the payment is booked, it will have an impact on both the customer and supplier payment records, reflecting the transaction and ensuring accurate financial tracking for both parties involved.
+
+However, it's important to note that the user can only create a trip if all payment entries are less than both the customer and supplier prices. For example, if the customer price is $1000 and the user has entered $500 as an advance payment and $600 as CPS (Customer Payment Section) payment, the total payment amounts exceed the price. In this case, the system will display an error message indicating that the payment amount exceeds the price, and the user will not be able to create the trip until the payment amounts are adjusted accordingly.
+
+This validation helps to ensure that the payment entries align with the overall price of the trip and prevents any discrepancies between the payment amounts and the agreed-upon prices. This type payment can done only if trip has an supplier.
+
+
+
+**Customer POD Balance**
+
+In this field, the system will automatically display the calculated balance amount based on the above calculations. This allows the user to view the remaining amount that needs to be received from the customer's side.
+
+After considering the customer and supplier payments entered, along with any other relevant factors, the system will determine the balance amount by subtracting the total payments from the customer or supplier from the total price or amount for the trip.
+
+By displaying the balance amount, the user can easily track and monitor the outstanding payment that is yet to be received from the customer. This feature provides a clear view of the financial status of the trip and helps in managing and tracking the payment process effectively.
+
+
+
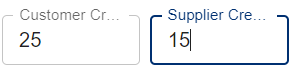
+**Customer and supplier credit days**
+
+In this system, the user has the ability to update the credit days for both the customer and the supplier. This allows the user to specify the number of days within which the payment needs to be processed for each party.
+
+By updating the credit days, the user can effectively manage and follow up on the payment process with the customer and supplier. This information serves as a reference for the user to ensure that the payment is made within the agreed-upon time frame. This feature helps streamline the financial operations and ensures timely payment processing to maintain good relationships with customers and suppliers. Maximum limit for credit days is 30. If user enter greater than 30, throughs error message.
+
+
+
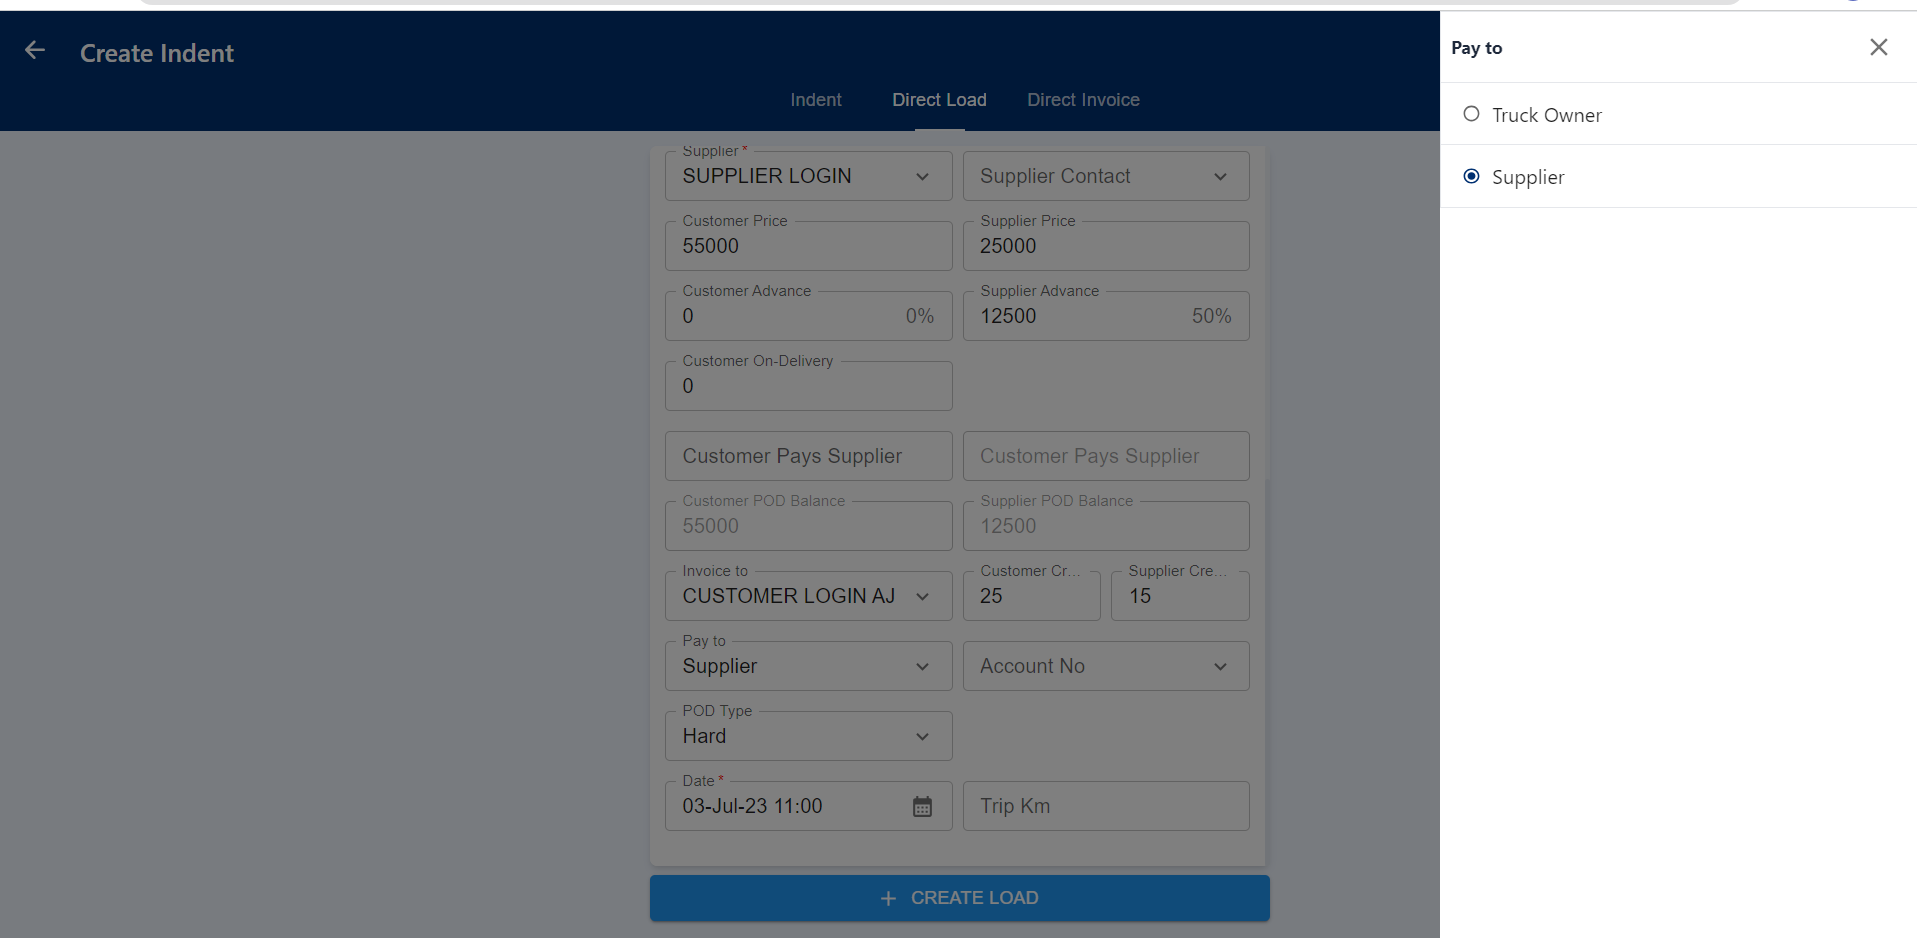
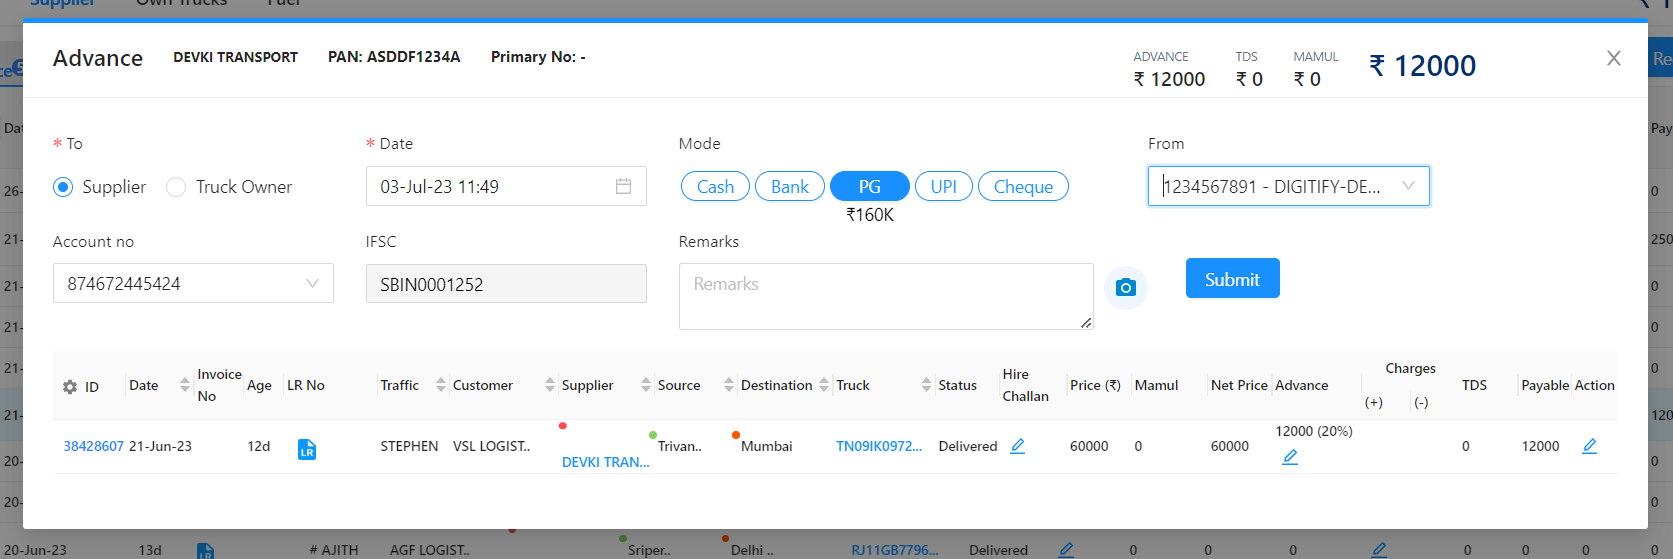
+**Paid To**
+
+In this column, the user can select whether to pay the advance amount to the supplier or the truck owner. By choosing the appropriate payment type, the user can specify whether the advance amount should be paid to the supplier or the truck owner. This selection ensures that the payment is directed to the intended recipient and facilitates accurate financial tracking and record-keeping.
+
+When booking the advance payment to the customer, the system will display the selected payment type, providing transparency and clarity regarding the payment flow and recipient. This feature helps ensure that the advance payment is correctly allocated and accounted for in the payment process.
+
+
+
+The selected payment type will be displayed when booking the advance payment to the Supplier.
+
+
+
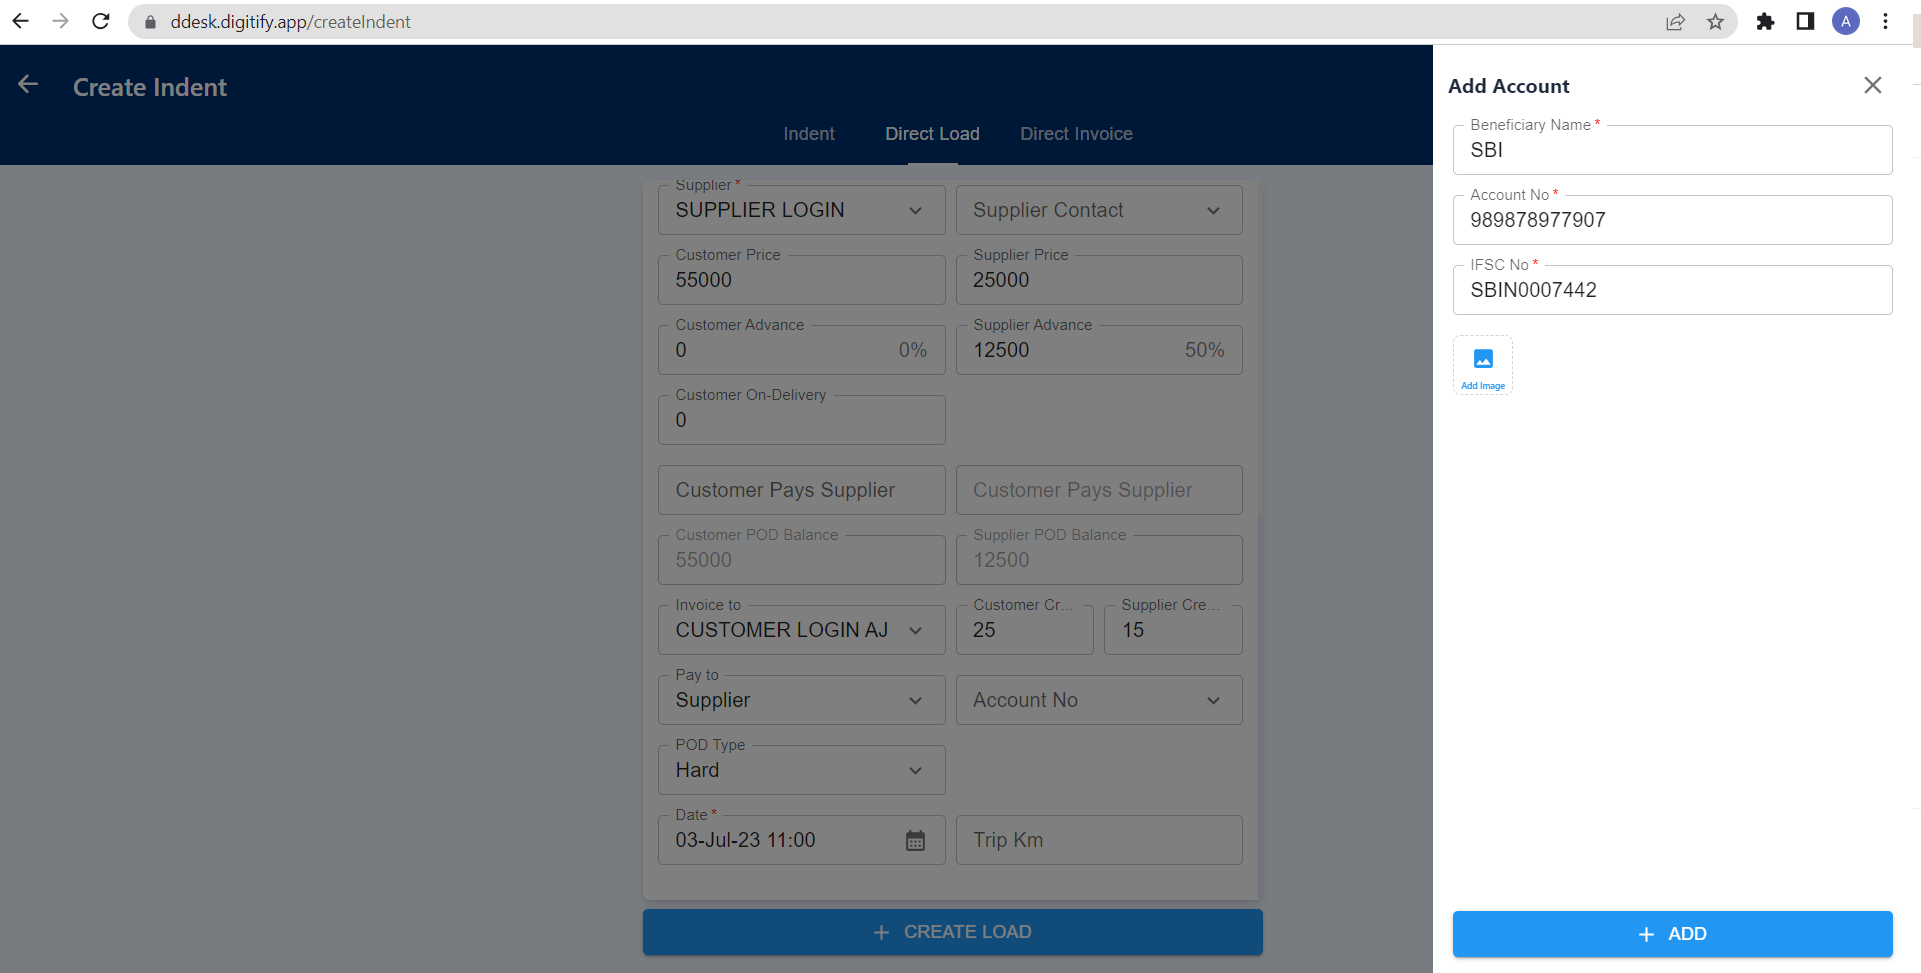
+**Account No**
+
+In this field, the system displays the supplier's account number(s) for processing payments. When the user clicks on the Account Number field, it triggers the display of the supplier's account number(s) on the right side of the screen. The user can then select the desired account from the list.
+
+If there are no existing account numbers for the supplier, the user can add an account number by clicking the "Add Account" button at the bottom. Clicking this button opens the "Add Account" screen, where the user can enter and update all the relevant account information based on the supplier's account details. After the account is added, the created account number will be displayed in the Account Number field.
+
+This feature provides the user with a convenient way to view and select the supplier's account number(s) for payment processing. It also allows for the addition of new account numbers when necessary, ensuring that the payment can be accurately directed to the appropriate account.
+
+
+
+**POD Type**
+
+In this field, the user can select the Proof of Delivery (POD) type for the trip. The POD type can be classified into three categories:
+
+1. Hard: With this type, the POD will be in the form of a hard copy, which can be sent through courier or delivered by hand. There is also an option for marking the POD as missing. To proceed with further processes, the user needs to approve the POD.
+2. Soft: In this type, there won't be a physical hard copy of the POD. Instead, the user can obtain the POD in the form of photo images, typically in JPEG or JPG format. Similar to the hard copy type, the user needs to approve the POD for further processing.
+3. No POD: This method allows the user to create a trip without a POD requirement. Once the trip is delivered, it will move directly to the invoice pending status without waiting for approval.
+
+These different POD types provide flexibility in capturing and managing the proof of delivery based on the specific requirements of each trip. The user can select the appropriate POD type, and the system will follow the defined workflow for handling and processing the POD accordingly.
+
+
+
+If the POD type is set to "Soft" or "No POD," it will be displayed as a badge in the trip detail page. This badge serves as a visual indicator of the POD type associated with the trip.By displaying the appropriate badge based on the POD type, users can quickly identify the nature of the POD associated with each trip in the trip detail page. This visual representation enhances clarity and ease of understanding regarding the availability and format of the POD for the respective trips.
+
+
+
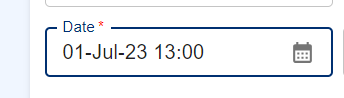
+**Date**
+
+In this feature, the user can select the trip created date. By default, the system displays the current date as the created date for the trip. However, the user has the flexibility to edit this field and choose a different date, including previous dates.
+
+This capability allows users to accurately reflect the actual creation date of the trip, even if it differs from the current date. It is particularly useful when there is a need to backdate the trip creation for any specific reason or when entering historical trip data.
+
+By enabling the selection of previous dates, the system ensures that the trip's creation date can be accurately recorded and maintained according to the user's requirements.
+
+
+
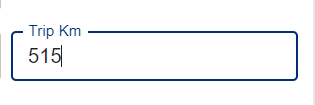
+**Trip KM**
+
+In this field, the system displays the total distance or kilometers (KM) for the trip. The value can be calculated in two ways:
+
+1. Based on the KM updated in the customer lane: If the KM for the specific customer lane has been previously updated, the system will display that value as the trip total KM.
+2. Automatically calculated based on the source and destination: If the KM for the customer lane has not been updated or manually entered, the system will automatically calculate the distance based on the source and destination locations. This calculation is typically done using predefined distance algorithms or services.
+3. Additionally, the user has the option to manually update the KM value if they have more accurate information or need to override the calculated or existing value.
+
+By displaying and allowing the user to update the trip's total KM, the system provides visibility and flexibility in capturing and managing the distance information associated with the trip.
+
+
+
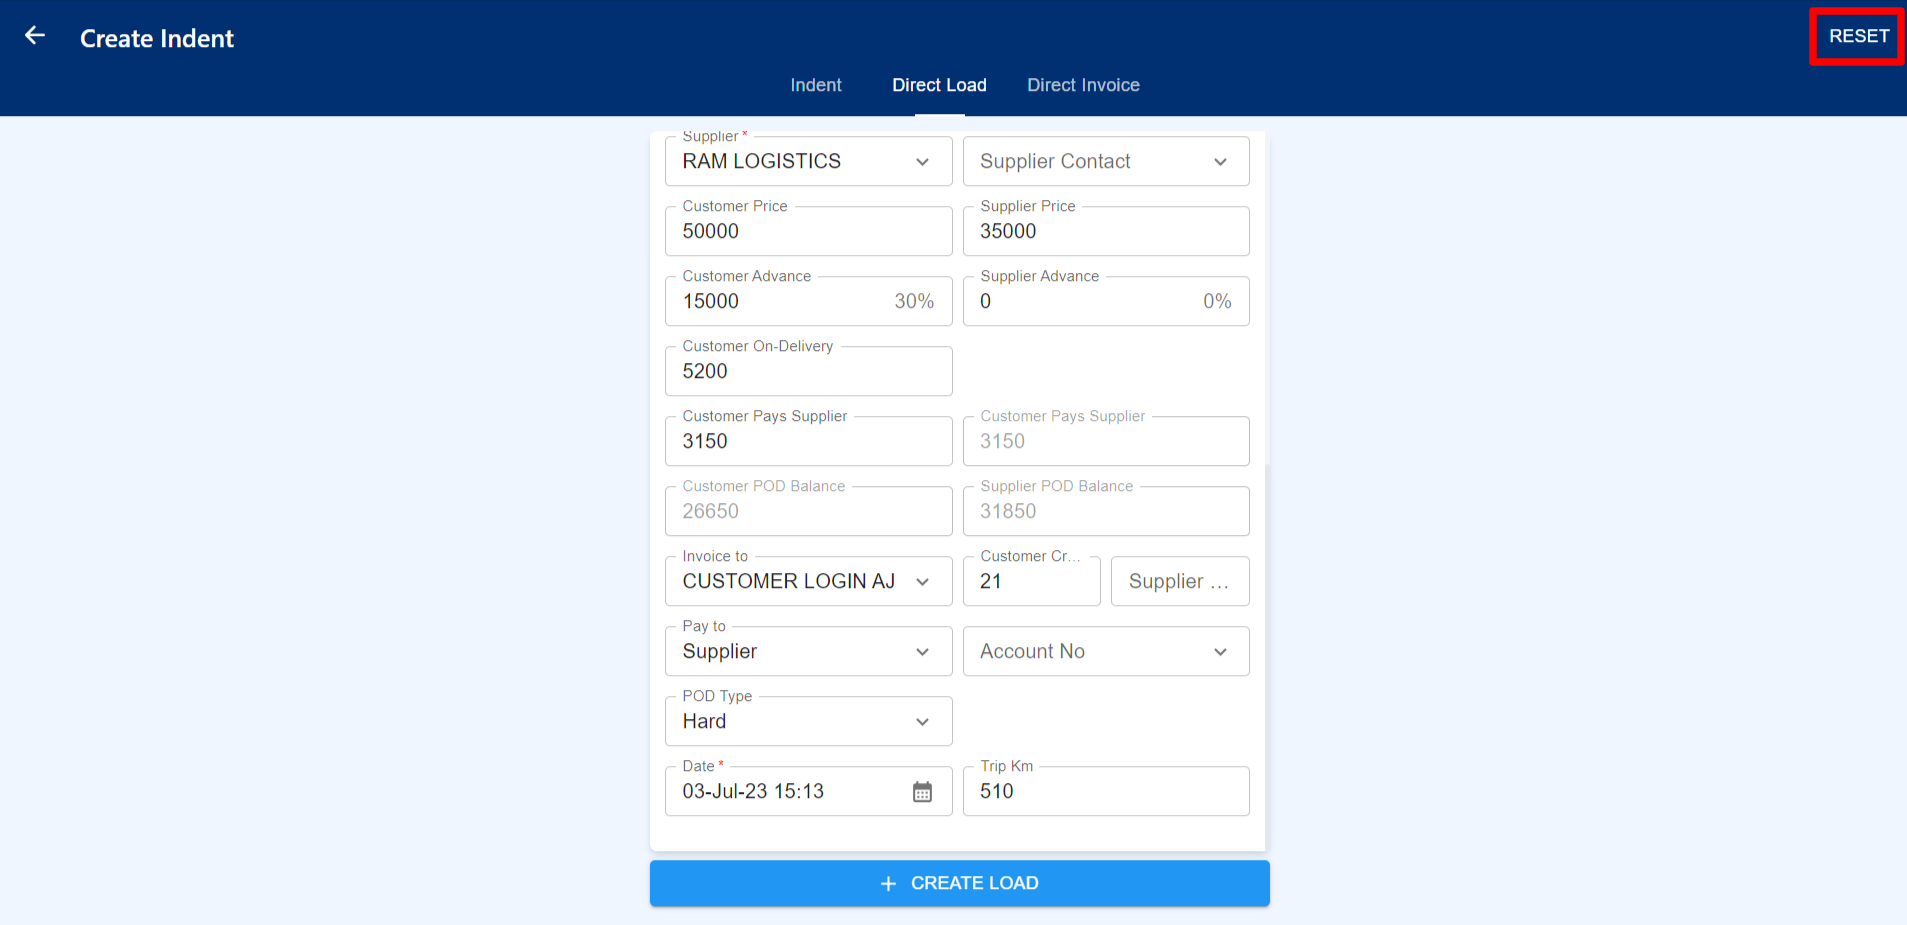
+**Reset**
+
+After updating the data, the user can clear all the entered information by clicking the "Reset" button located at the top of the page. This feature is useful in cases where the user has entered incorrect or unwanted data and wishes to start fresh. By clicking the "Reset" button, all the updated fields will be cleared, returning them to their default or empty state. This allows the user to make corrections or re-enter the data accurately without the need to manually clear each field individually.
+
+The "Reset" button provides a convenient and efficient way for users to undo their changes and ensure that only the intended and accurate data is entered into the system.
+
+
+
+
+
+
+
+After updating all the necessary data, the user can create a direct load by clicking the "Create Load" button located at the bottom of the screen. Upon clicking this button, the system will generate a trip based on the entered information and the load will be created.
+
+The newly created trip will then be displayed in the "Trips" section, specifically under the "Confirmed" tab. This tab serves as a repository for all confirmed trips, allowing users to easily access and manage them.
+
+